
The following paragraphs are tracked back to mhhauto.com (thanks and rep to Baja juan).
I thought I would write this guide because it could help somebody who has never seen chip-tuning before and is learning about it. These days this information is getting lost fast I think and there are genuinely people who dont know how to do this, so I decided to write this thorough step-by-step guide with photos of every step to help to learn.
This family of early EDC15 was used in VAG TDi VP motors (and other things). Unfortunately, the version we are talking about here is not flashable. That means that to remap it you have to physically take the chips out, write new chips and put them back in. I will show you how to do this, fit sockets, convert to flash chips and also to deal with immo so you can use the ecu in any car.
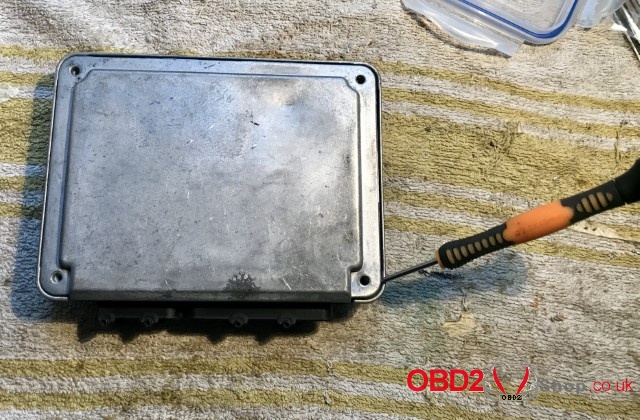
So first of all the ecu itself. I am using a TDi110 but there are many numbers to choose from.

The first thing we have to do is open it. There are four Torx screws in the bottom. Sometimes if the ECU was living somewhere wet (like a Golf in a country or state where it rains a lot) the screws will be very hard to remove. If that happens, hit the tops of the screws with a hammer, that will help a lot. Dont use heat or liquid products.

When you take out the screws, the ECU will not come apart. This is because its held together by a special glue which never dries. That shit is very sticky and sticks to everything. To take the ECU apart we have to physically stick a screwdriver in there and pry the two halves apart. It is fairly difficult, that glue is strong!
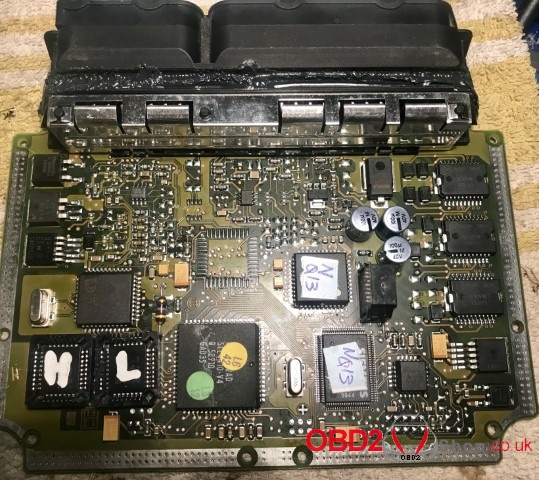
Once you can pull it apart you will finally see the board inside.
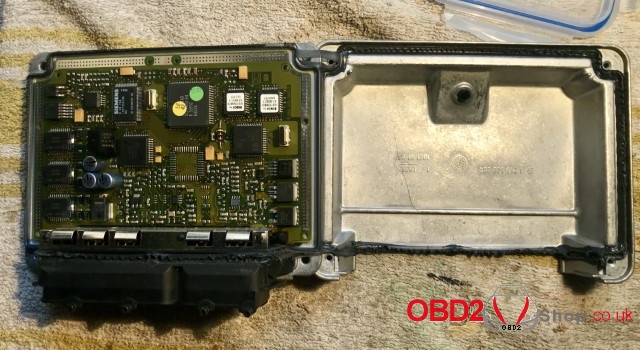
You have to also pull the board from the bottom of the case (more of that black glue) but it will come out.
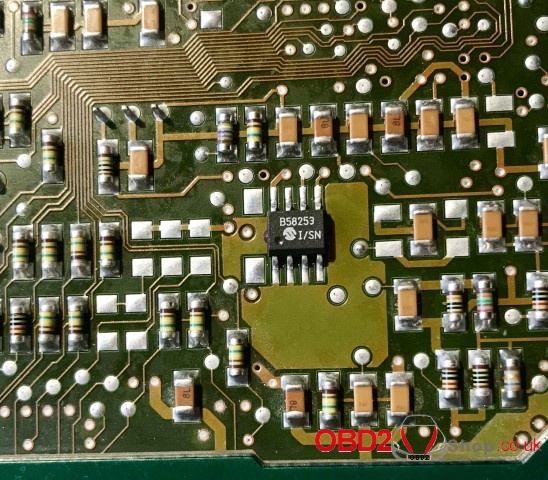
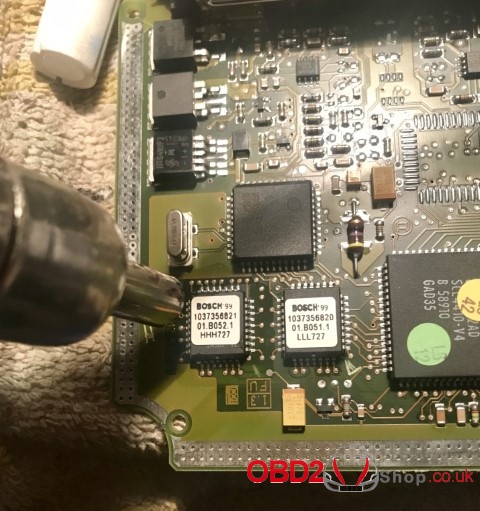
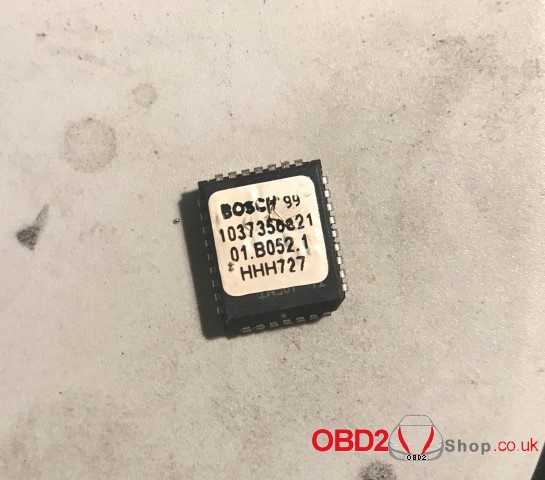
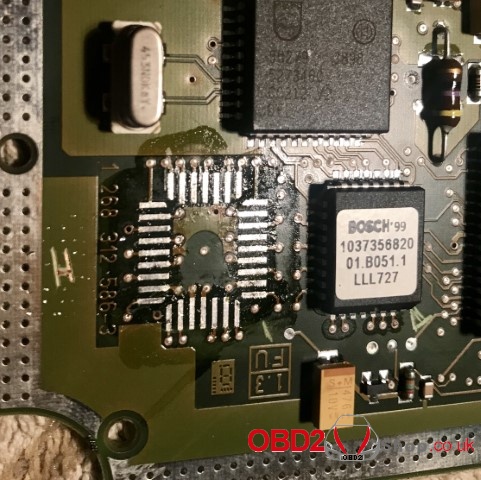
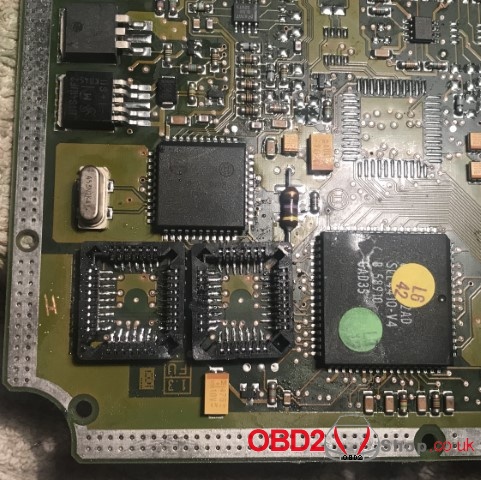
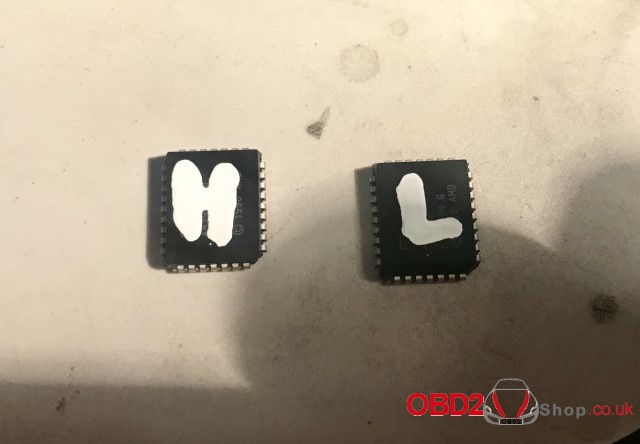
Here we see the top side of the board. The two chips highlighted in red are the two memory chips (eproms) which hold the map data. There are two and they are usually called HHH and LLL. The HHH is always closer to the side of the board and the LLL is closer to the middle. By the way, in case you are curious, the HHH holds data about fuel maps and the LLL holds data about turbo control maps.
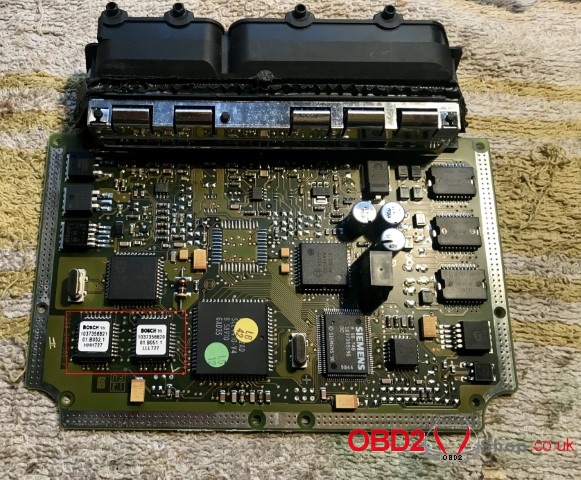
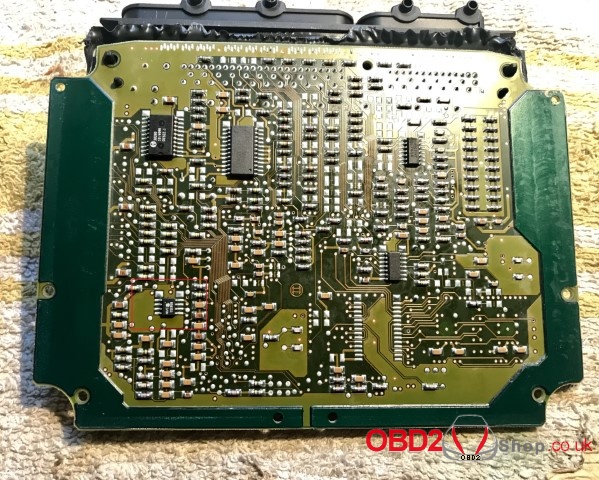
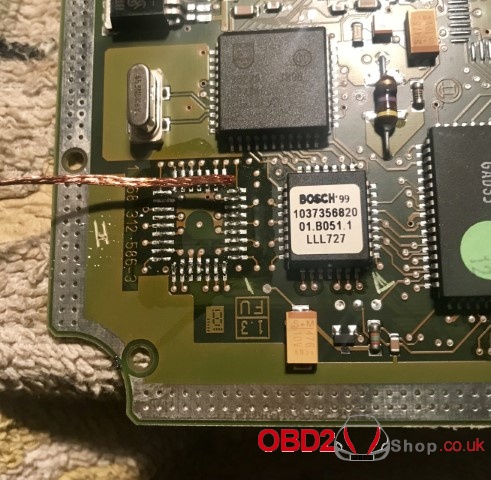
On the bottom of the board is the EEprom chip which holds immo and other data.
Here you see a closeup of the eprom chips.

And here you see the other chip.
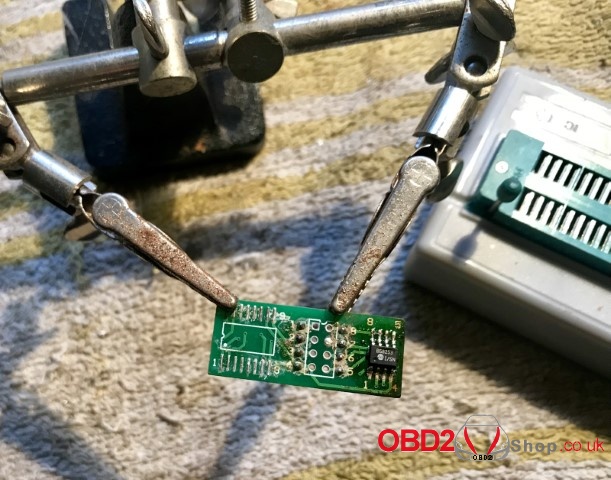
The first modification people usually make is to remove the immo. That means the ECU can work in any car without matching the immo system, and is also very useful if you are putting the engine into another car, because then it will still work with no immo. We are doing this modification so the ECU will start the engine with a no-start signal or with no signal at all from the immo system. To do this we need to remove that small chip. It is also possible to do this without removing the chip, you need to short the local crystal and then use a in-board clip, but I dont like that method, its always unreliable for me. I prefer to solder. Some people use a clip and like that method. Personal choice I guess.
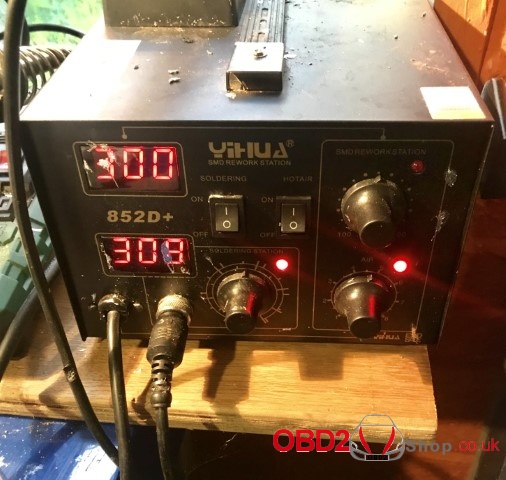
I do this with the hot air station. I set mine to 300c, its a little cold for this work really but it minimizes the chance of damaging the pcb. These old Bosch boards can and do get damaged, be careful.
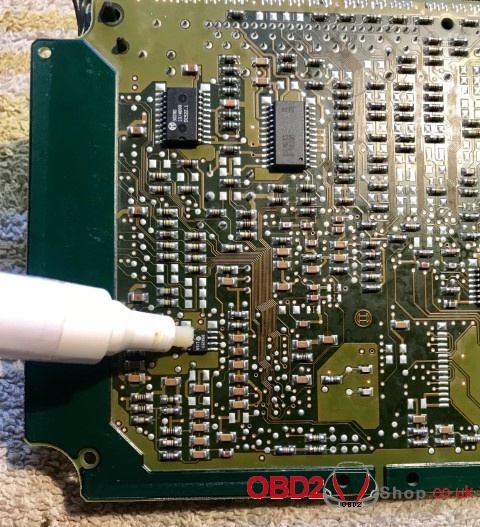
First we apply flux to the chips legs. I used RMA because I like working with it. No clean is also ok but not as good. You have to clean RMA after tho whereas no-clean as its called can just be left.
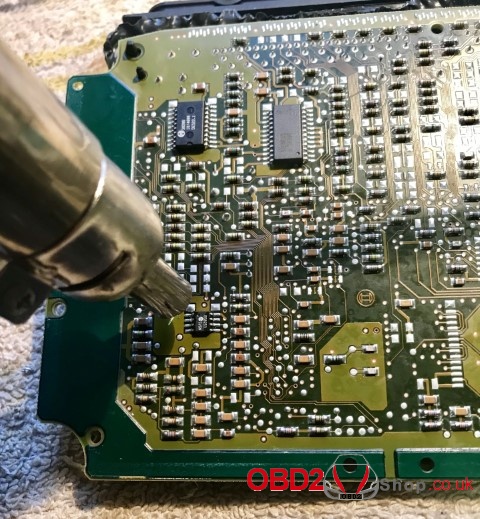
Then heat the chip with the hot air until you can take it off. I use stainless steel forceps for this and always pull on the chip while heating. As soon as the solder is soft it will pull off, minimum heat.
And there it is.

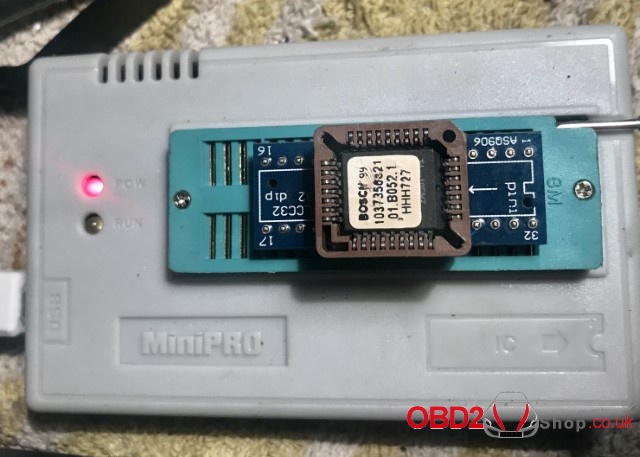
I solder it to the programmer chip holder using hot air only and flux. Some people prefer to solder it with a SMD iron but I only use hot air. As long as you are used to it, it works. If you are not so used to it maybe go over it with a smd iron also just to make sure there are no bad joins.
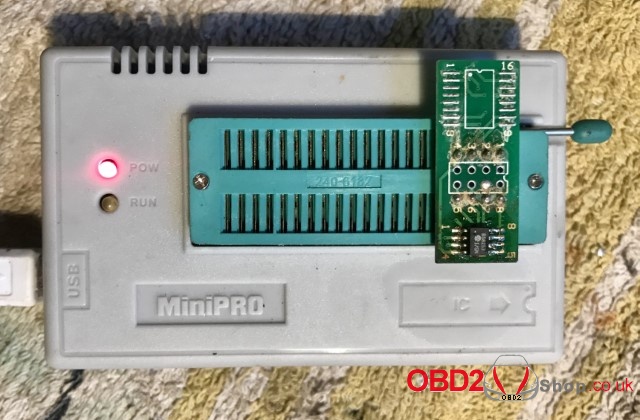
(Image: Super Mini Pro TL866A EEPROM Programmer)
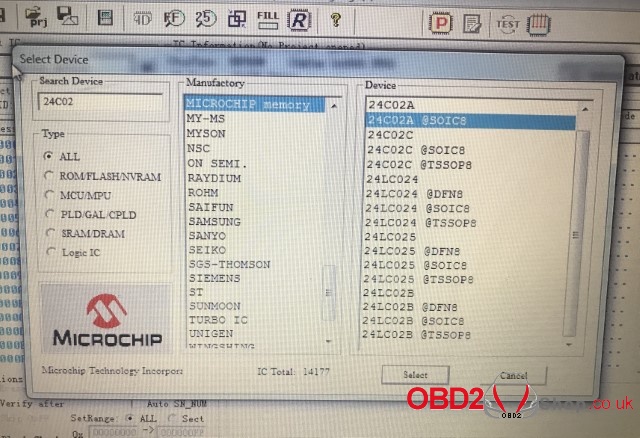
First we need to figure out what that chip actually is. Bosch use ‘mask’ numbers, their own numbering system. However you can find lists online. This list tells us that the chip with this Bosch number is actually a 24c02.
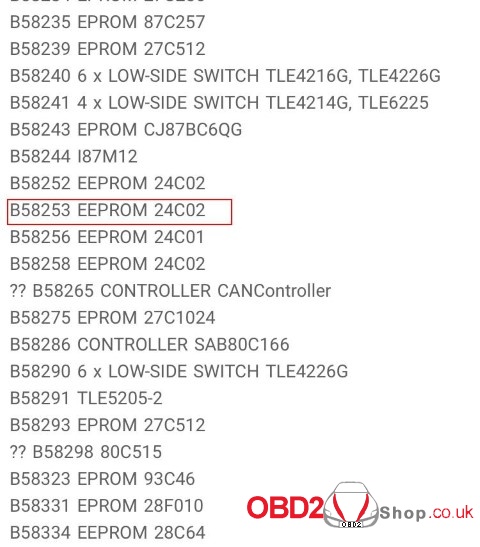
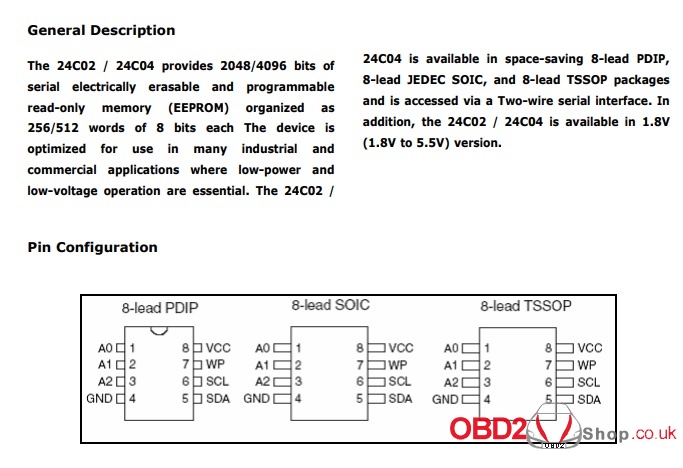
You can find its datasheet online everywhere, but its a EEprom, which means it can be programmed and erased many times.
So we read it in the programmer as a 24c02.
Then afterwards make the modification to the file to make the immo not work (this article is about hardware only, but there are a lot of guides for how to do this), write the new file back to the chip and solder the chip back to the ECU. If using RMA flux dont forget to clean! I use a tooth brush and automotive brake-cleaner. Works very well with RMA.

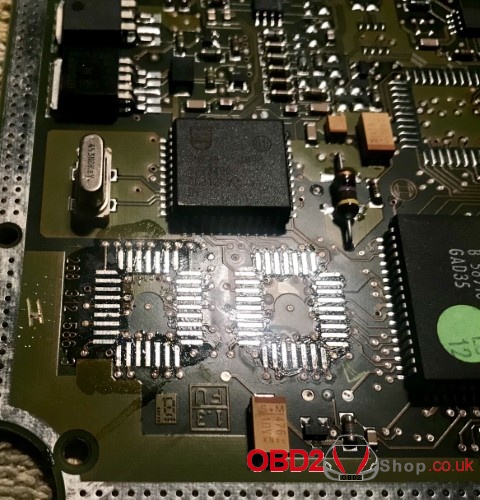
So next we have to deal with the memory chips which hold the map data. You can remove them in the same way, by putting flux on the legs and heating with hot air while pulling with forceps, as soon as the solder is soft the chip will pull off.
The sticker will probably melt a little bit, the is normal.
These chips are eproms, which means that they can only be written once. They cant be erased again. The Bosch factory solders them to the board, however we will add sockets, so the chips can be removed and fitted many times without solder.
You will be left with a lot of solder on the board. This needs to be removed to fit the socket, unless you are using a very good old-stock socket.

To remove the solder I use a bigger (not smd) soldering iron set to 350c and solder braid, it works very well.
Now you have clean tracks ready for the socket.
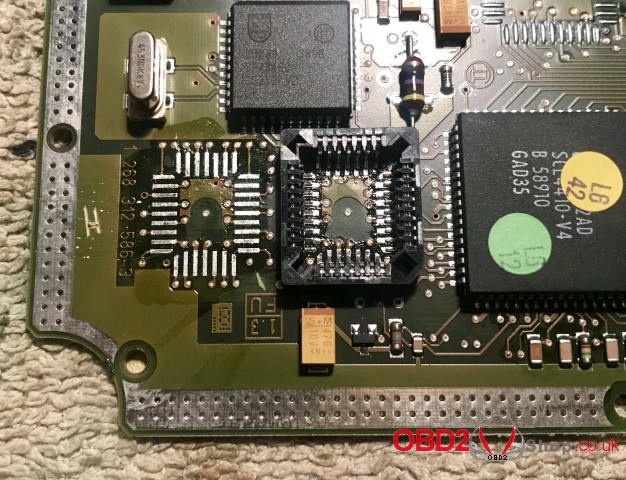
I mentioned that you dont need to do this if using good quality sockets. The problem is that modern sockets are shit. Old sockets used to be made from a plastic which is ok to about 400c, so you can hot-air solder them. For this you leave the old solder on the tracks, as it will solder the new socket on. However, modern ebay sockets are made from a shit plastic which melts at less than 300c, so you cant hot air solder them, they will melt before the solder. So you have to solder them with a smd iron, one leg at a time, and for this you need to clean the tracks first.
The sockets look like this.

Its a good idea to cut the bottom plates out, because it will make it a lot easier to solder. Dont throw them away. You can glue them back to the board later to make the chips sit at the correct height, otherwise there can be connection problems. But for now cutting them out makes it much easier.

For the LLL socket, you also need to slightly cut melt or sand one corner, otherwise it will hit the big resistor on the board. You can do this with the soldering iron or sand paper or file or whatever.

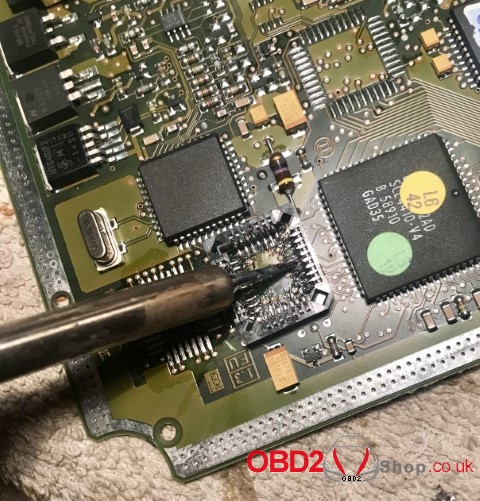
I like to put the socket on the tracks and then put RMA flux on it. As the flux dries it will stick the socket to the board so it doesnt move as easily.
Now to solder it. I use a chisel-tip smd iron set to 320c. Be careful to not touch the socket with the iron, it will melt.
And now we have sockets! We can now fit and remove chips as much as we want without solder, for tuning or testing.
Next task is to read the old chips. The problem is that Bosch used a lot of different models of chips and without ripping the sticker off, you cant really tell. And even then all you will know is the Bosch mask. However we know they are some type of 27c010. Although most 27c010 read the same, its probably still better to use the exact correct model, so there is a trick we can use.
First of all I put the chip in the adaptor for the programmer. Make sure you use a good quality adaptor, clean it and the chip with brake cleaner, and read the chip and verify it several times after removing it from the socket and putting it back. Read errors are common.
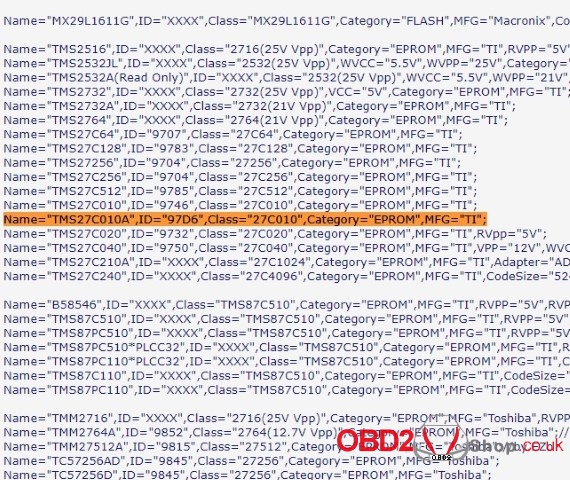
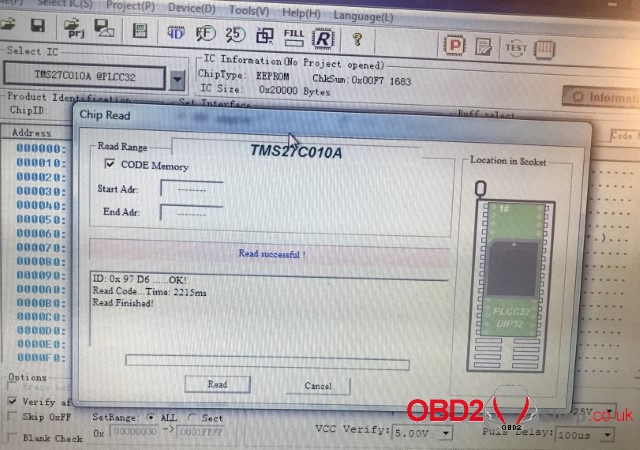
I put the chip into the programmer and pick a random 27c010 model. Unless you got lucky the first time, when you read it it will show an error:

From this we can see that the chips ID is 97d6. We can use this ID to find exactly way chip this is. There are lists online you can find.
We can see that this ID means its a TMS27c010a by Texas Instruments. It can be many models tho, by Microchip or other companies. Bosch just used whatever they bought that week I think.
Now we know its this chip.
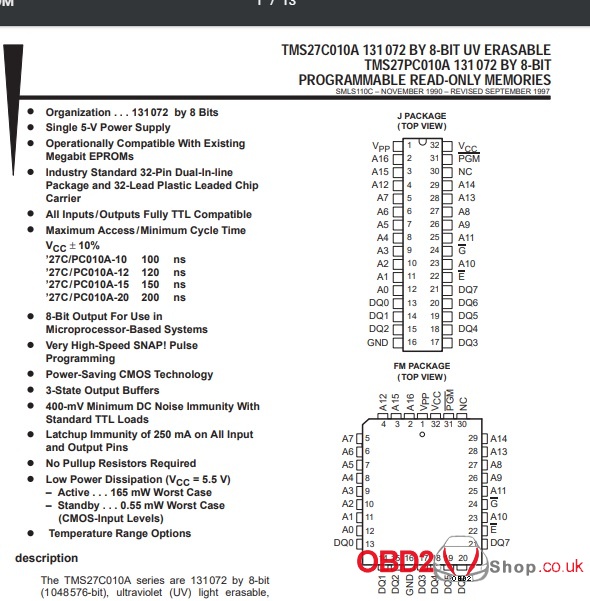
We can read it as the correct model. As I mentioned earlier, a lot of times it makes no difference anyway, but its still good to do it correctly.
Now it reads correctly.
Now you can do your modifications for tuning to the files.
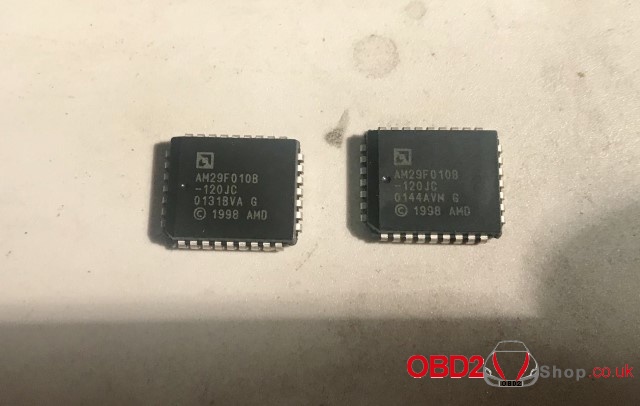
Because the original chips are Eproms which can only be written once, you cant re-flash them. You can only read them and buy new chips. You can still buy 27c010 chips reasonably easily, however I prefer to convert to flash chips. This is because unlike Eproms, flash can be written and erased many many times. So if you are tuning yourself or changing things a lot, its very useful, you only need two chips, and you can remove them from the socket, write new data, put them back in, test, etc. If you used 27c010 chips you would have to buy new chips for each try, but with flash you can keep using the same chips.
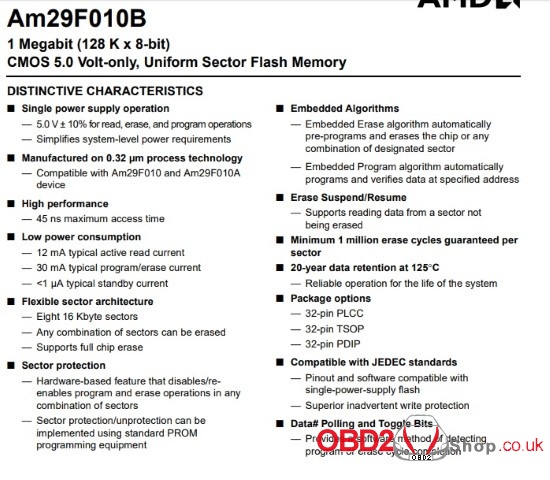
There is a flash chip which will work directly with no mods, its the 29F010. I am using AM29F010B, however and 29F010 will work.
________________________________________
Now if you mark the HHH and LLL chips so you know which is which, you can keep using them again and again for all your tuning.
Write them

And put them into the sockets, and there you go, your ecu is now modified and ready for tuning.
If you want, if you are not starting tuning yet, you can write the contents of the original chips to these flash chips. Your ECU will still work like standard, but now you are ready for tuning when the day comes.
Well, that’s it friends. I hope somebody found this useful.