
")

")
This is a guide on how to register & update GODIAG scan tool software for the first time, which applies to GODIAG GD201, GD202, GD203.
Don’t know how to choose?
GODIAG GD201 vs. GD202 vs. GD203 Comparison
http://blog.obd2shop.co.uk/godiag-gd201-vs-gd202-vs-gd203/
How to register GODIAG scan tool?
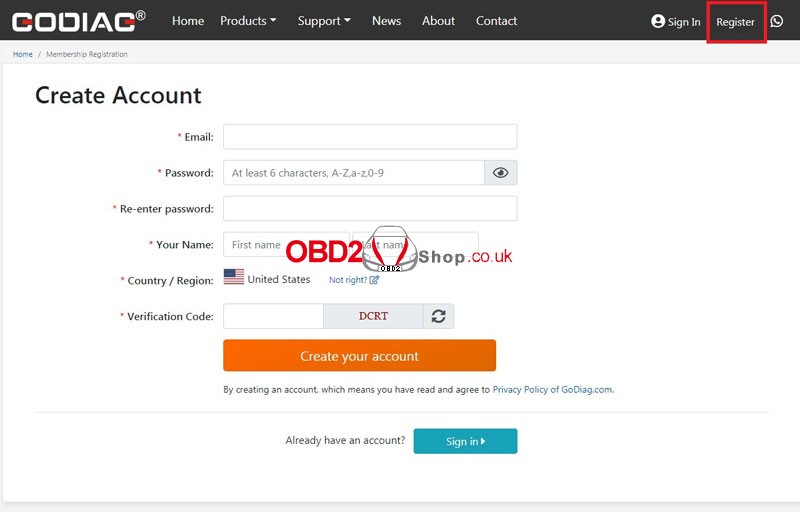
- Register through the official website https://www.godiag.com/
Fill in Email, password, name, country, and verification code to create an account.
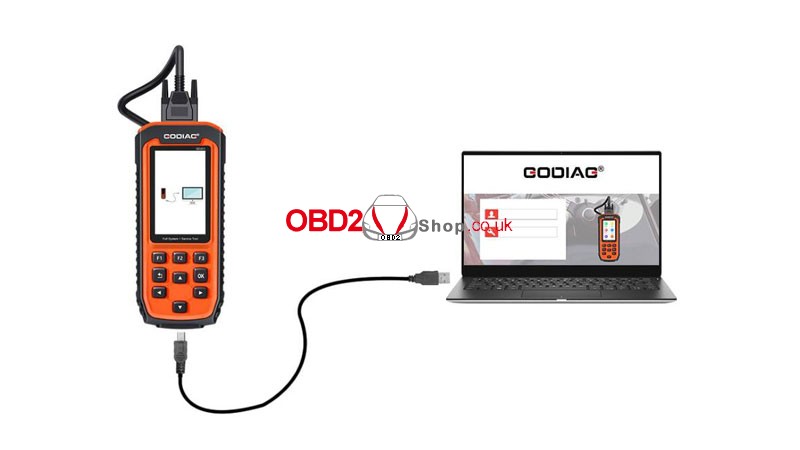
- Register through update software GODIAG
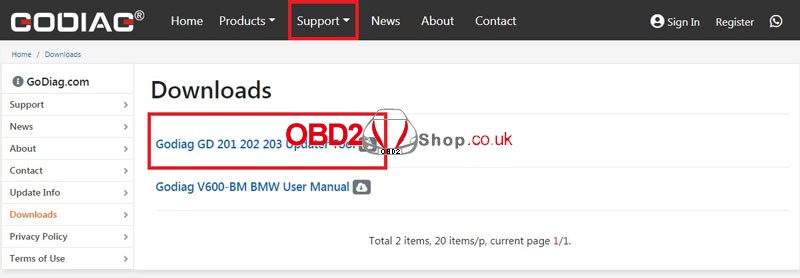
- Connect GODIAG scanner with computer via USB cable, click “Godiag Update Tool.exe”to install directly; Or go to https://www.godiag.com/info/downloads/ (GODIAG >> Support >> Downloads )to download the latest version of updater tool.
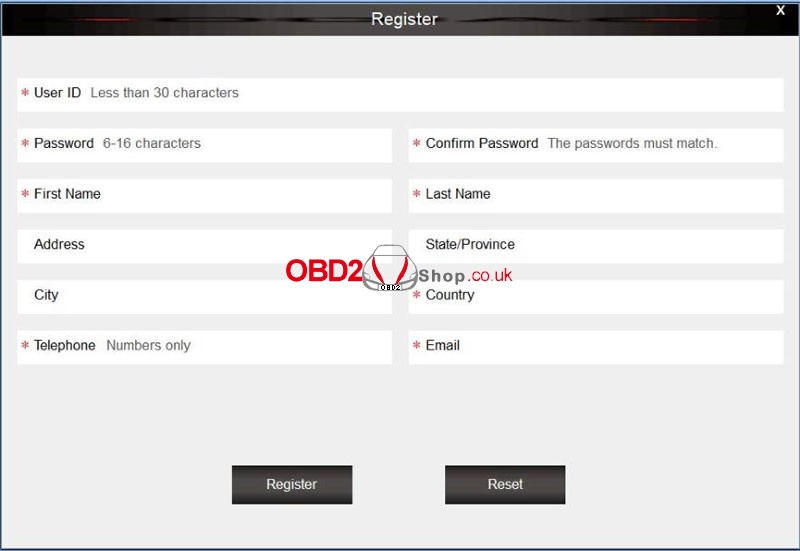
- Fill in the information to finish registration.
How to add GODIAG tool to your account?
NOTE:
- For new users, registration will be automatically finished when connecting scanner with computer via USB cable and running GODIAG.
- For users who have already registered, please follow the steps below.
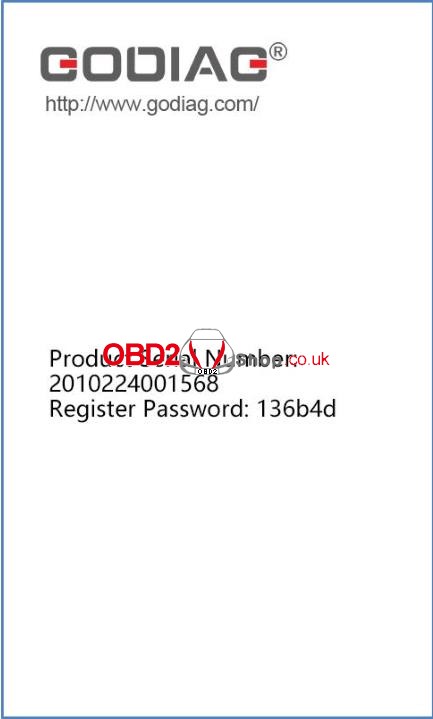
- Please find “Serial Number”& “Register Password” by selecting “Setup >> About” on GODIAG tool(Or check the Password Paper in Register Password). Click “Register Products” icon after successfully login.
- Selected “001”option on “S/N Registration” tab, input SN & password to submit.
- A confirmation box will display to show successful registration(or register the tool in member center when logging in official website).
How to update GODIAG scan tool?
- Connect GODIAG tool with computer via USB cable.
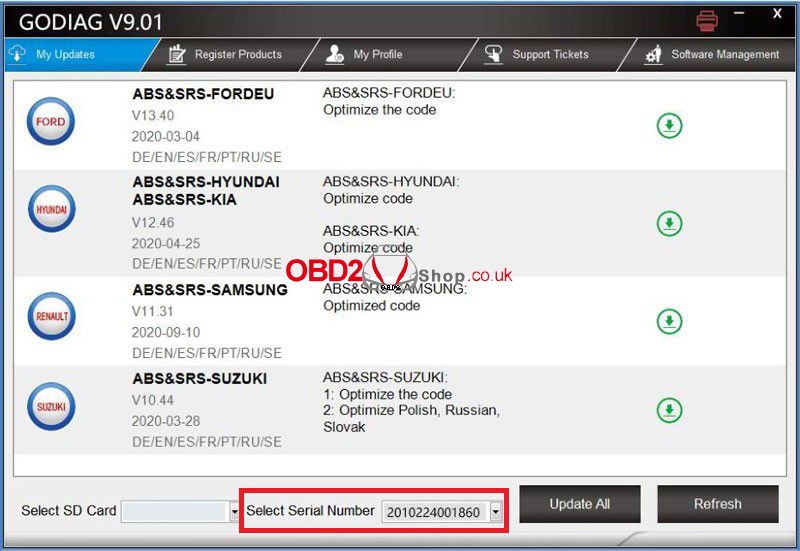
- Running Godiag Update Tool and logging in, click “My Update”, software list will display after a while.
(Please make sure the SN is correct in the drop-down list)
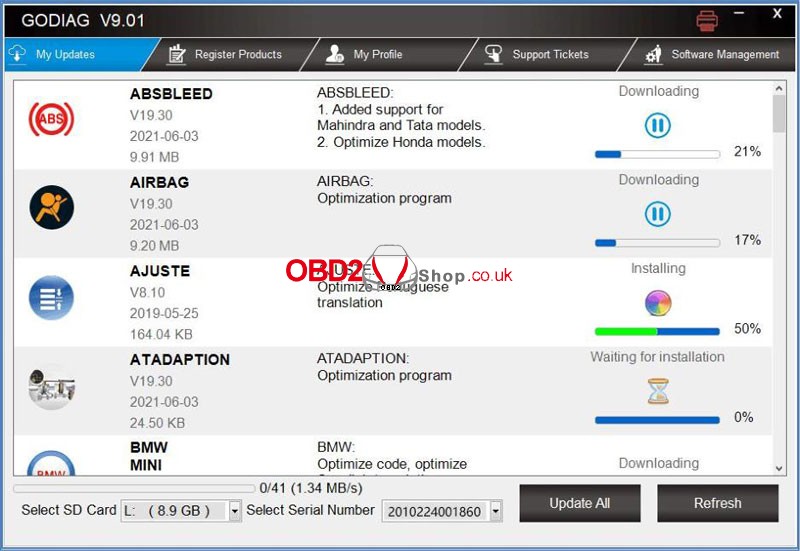
- Click “Update”to start downloading and installing.
Note: It’ll take some time for update process. Please make sure updates are 100% completed before disconnecting scanner from computer to avoid the possibility of data corruption.
Download: GODIAG Scan Tool User Manual