


This guide explains how to diagnose Tesla battery interfaces using the TOPDON Phoenix Max and EV Package. Follow the steps below to access the battery pack interface diagnosis function and view detailed battery voltage and temperature data.
1. Disconnect the Battery Pack’s Low-Voltage Connector
First, open the rear door of the Tesla.
① Release the retaining clips securing the rear seat.
② Remove the rear seat.
③ Remove the protective cover from the battery pack connector.
④ Disconnect the battery pack’s low-voltage connector.


Note: Leaving the low-voltage connector disconnected for an extended period may prevent the vehicle from supplying high-voltage power. If this happens, the vehicle may need to be jump-started to restore operation.
2. Connect the Diagnostic Equipment
Prepare the following tools:
Battery Pack Diagnostic Cable
MDCI PRO Diagnostic Box
Diagnostic Cable
External Power Supply
Connection steps:
① Connect the diagnostic cable to the vehicle.
② Connect the MDCI PRO diagnostic box.
③ Connect the power supply to the diagnostic cable.


3. Select the Tesla Vehicle Model
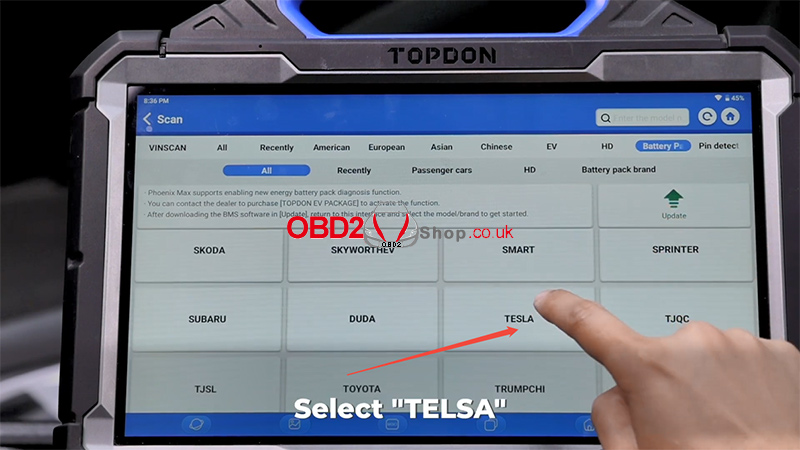
Turn on the TOPDON Phoenix Max and enter the diagnostic interface.
Follow this menu path:
Scan >> TESLA >> OK
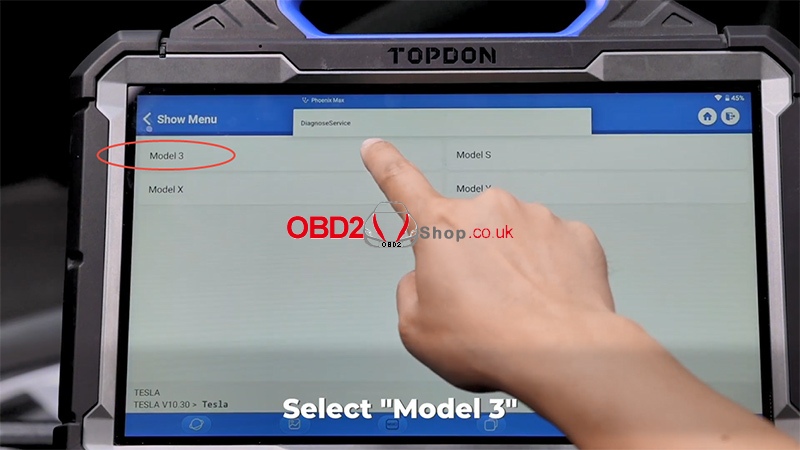
Then select:
Model 3 >> 108 cells


4. Perform Battery Pack Interface Diagnosis
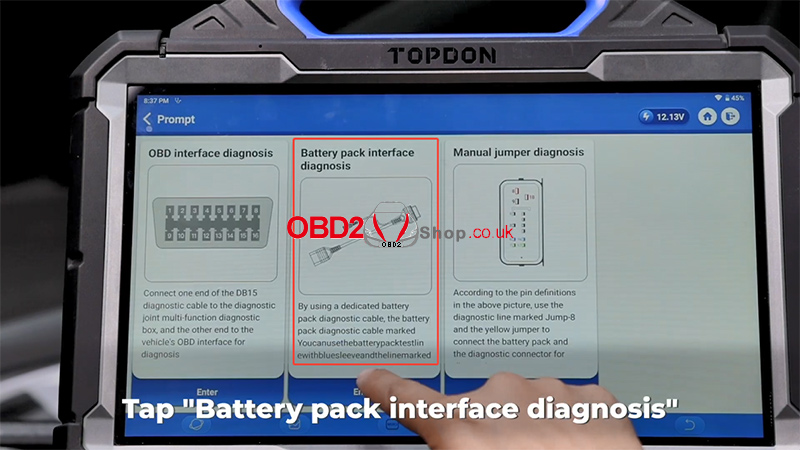
After entering the vehicle system, tap Battery Pack Interface Diagnosis.
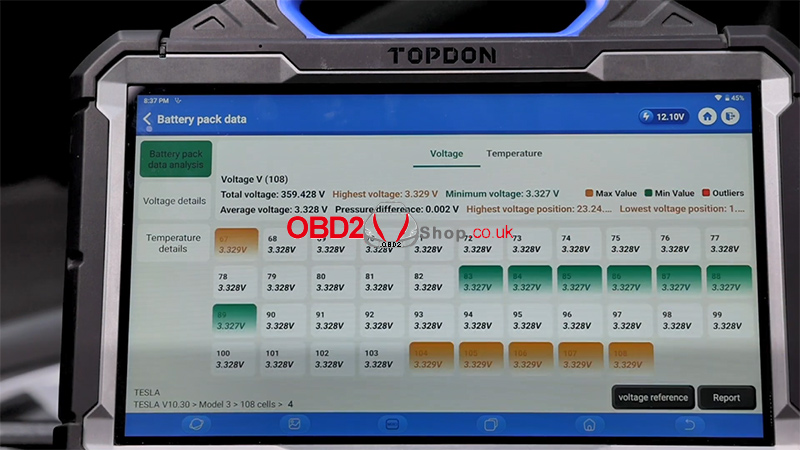
The battery pack data analysis screen will display detailed information about the battery pack, including:
Battery pack voltage
Battery pack temperature
You can use this information to check the battery pack’s operating data and assist with further diagnosis.
Video Guide
For a step-by-step demonstration, watch the video:
For more automotive diagnostic tools and solutions, visit:
www.obd2shop.co.uk
