
The CGDI K2 is a versatile remote key programmer that generates, copies, and reprograms car keys and remotes. Follow this simple guide to get started.
1. First-Time Setup
(1) Press and hold the power button to turn on.
(2) Connect to Wi-Fi to activate the device and update software/firmware.
(3) Log in to your CGDI account, or create one if you don’t have one.
2. Basic Controls
(1) Short-press the power button: turns the screen on/off.
(2) Hold the power button for 5 seconds: forces a shutdown.
(3) Device auto-shuts down when battery is below 5%.
(4) Charge using a 4.5V–5.5V/1A charger and Type-C cable.

Main Functions
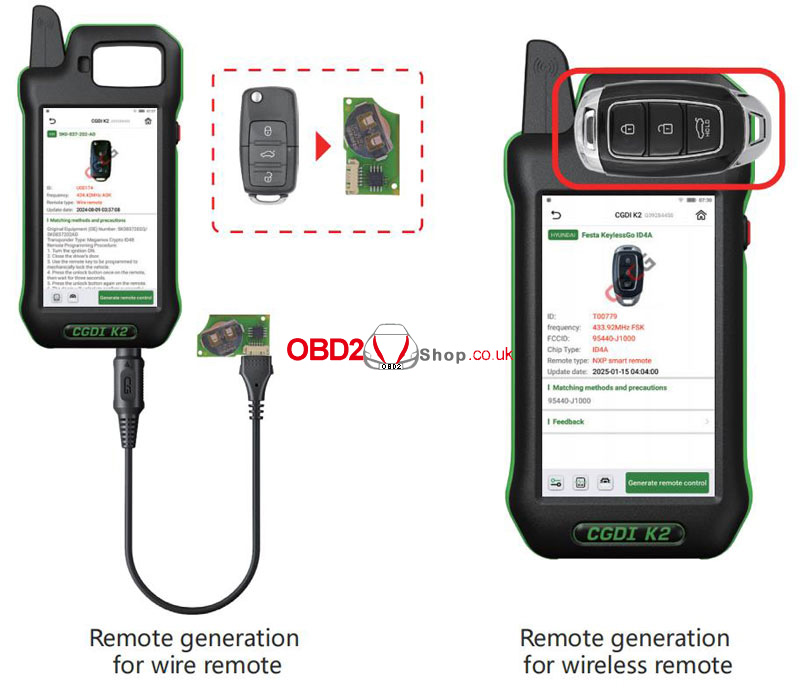
1. Generate Wireless Remote
① Go to Remote Generation from the home screen.
② Select your car model.
③ Connect the remote to the device using the programming cable.
④ Choose Wired Generation and confirm.
2. Generate Smart Remote
① Select the car model.
② Place the CG Smart Key on the device coil.
③ Click Generate Remote and wait for completion.
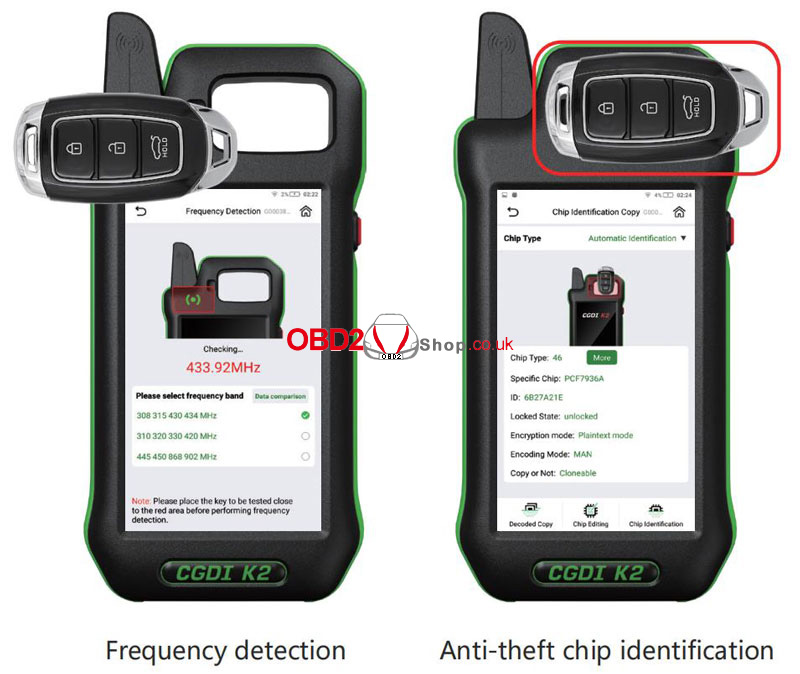
3. Frequency Detection
① Enter Frequency Detection from the main menu.
② Choose a frequency band and place the remote near the detection area.
③ Press any button on the remote.
4. Chip Identification
① Select Chip Identification Copy.
② Choose Auto or Manual chip detection.
③ Place the key on the coil and view chip details.
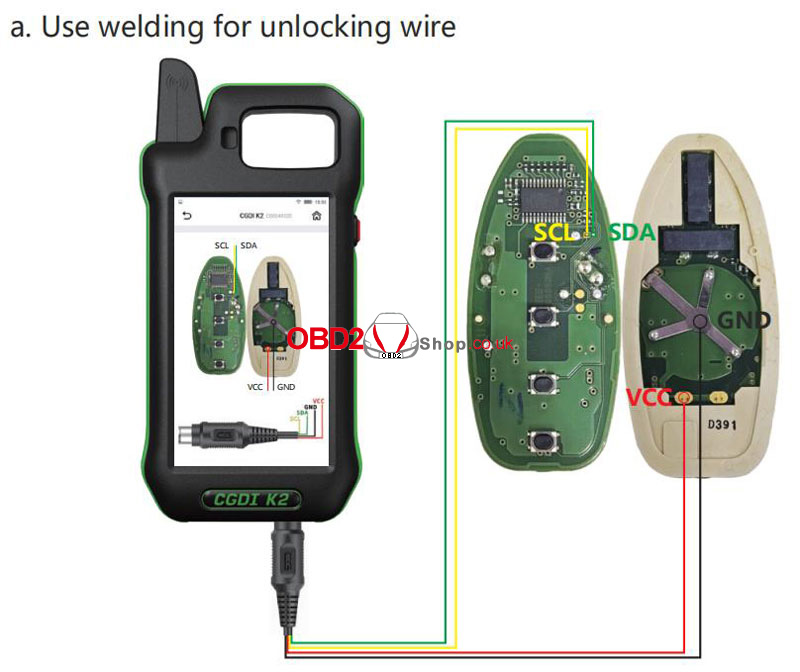
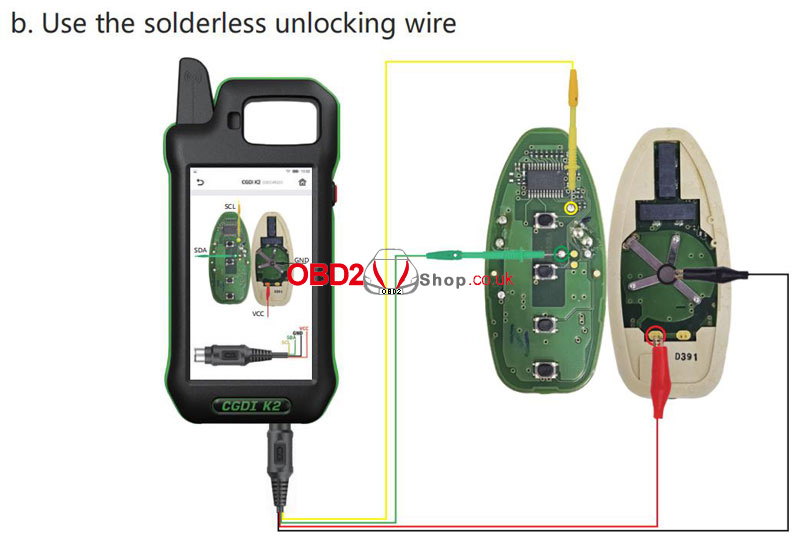
5. Remote Renew
① Access via More Functions → Remote Renew.
② Choose solder or solderless wiring.
③ Connect the key with the Unlock Solder-free Cable correctly, confirm the model, and click Renew.
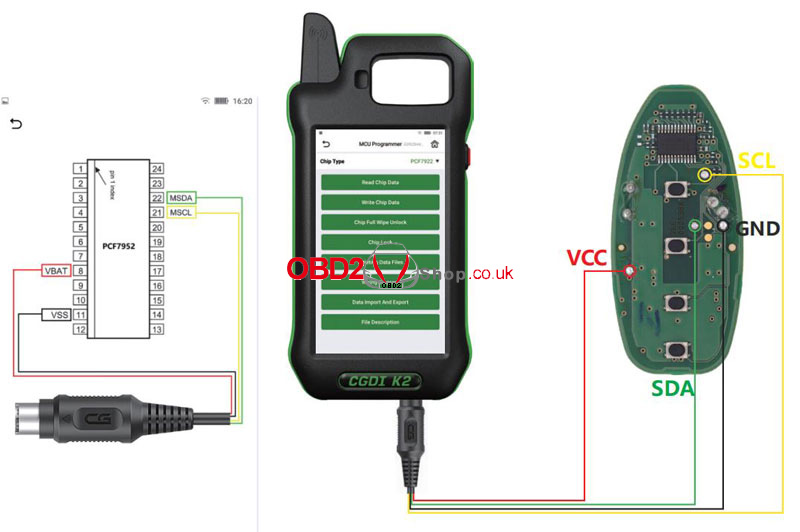
6. MCU Programmer
① Go to More Functions → MCU Programmer.
② Select the model and connect according to the wiring diagram.
③ Read, write, or program the MCU as needed.
This CGDI K2 Remote Key Programmer guide is optimized for clarity and ease of use. Perfect for locksmiths, auto technicians, and car owners looking for a straightforward key programming solution.