
")

")
This article explains how to use the Launch X431 ECU & TCU Programmer to read and write ECU data step by step. By following this guide, you can safely back up and restore ECU EEPROM and Flash data using bench mode.
Step 1: Get Related ECU Information
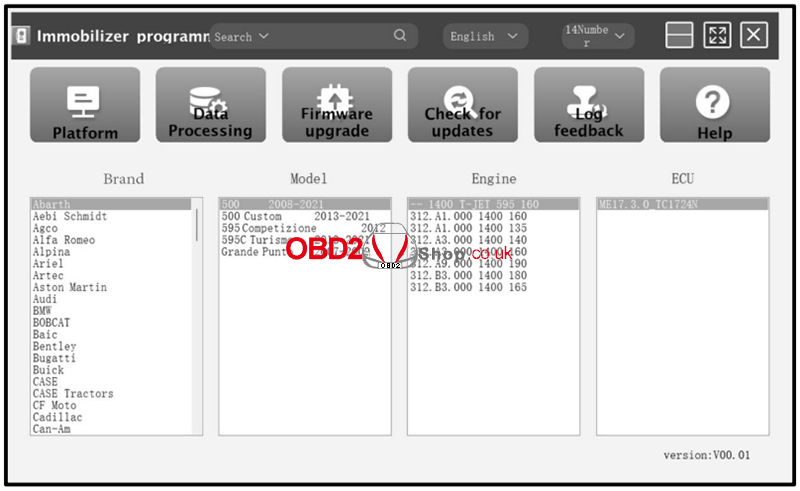
1. As shown in Figure 1, select the target ECU by navigating through: Brand → Model → Engine → ECU.
Select the corresponding ECU type based on the vehicle information.
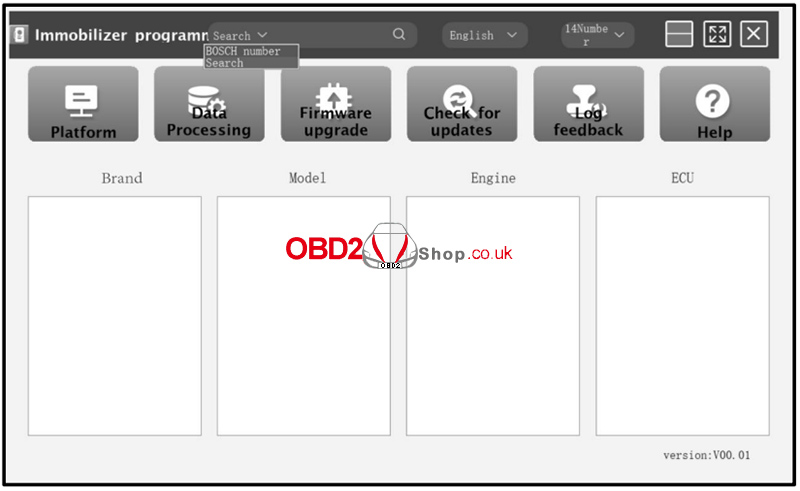
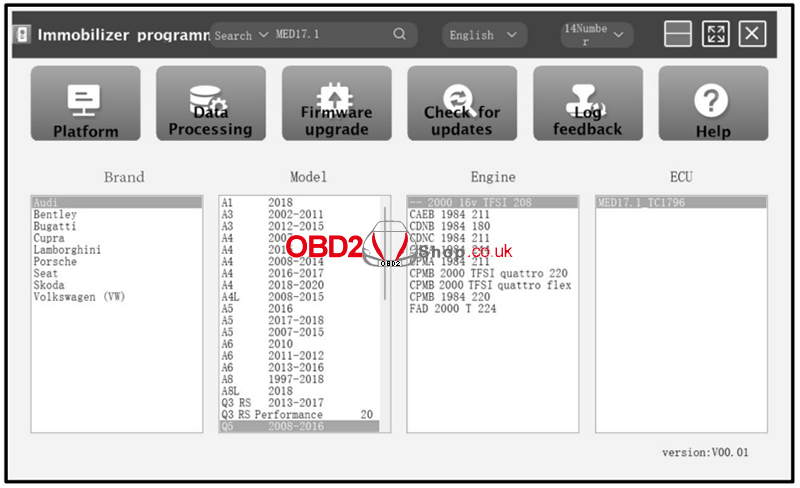
2. Alternatively, you can search directly using the search box. Enter relevant information such as Brand, Bosch ID, or ECU type.
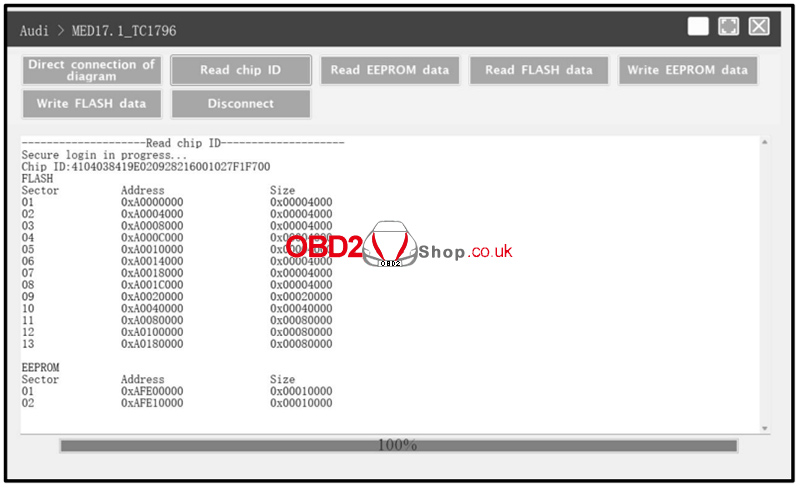
For example, search for the MED17.1 ECU to quickly locate the engine model, as shown in Figures 2 and 3.
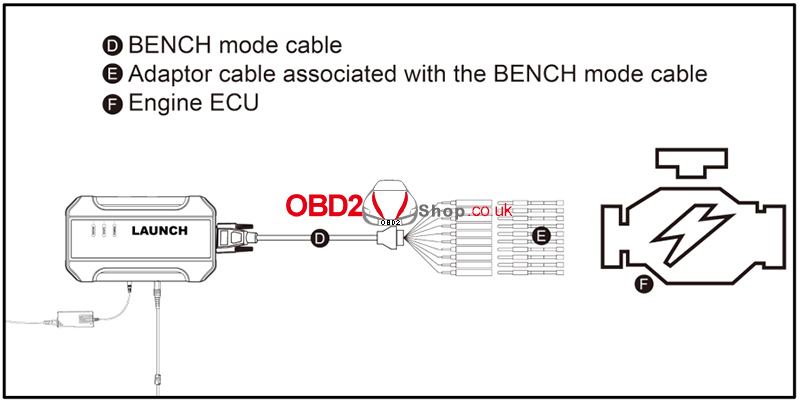
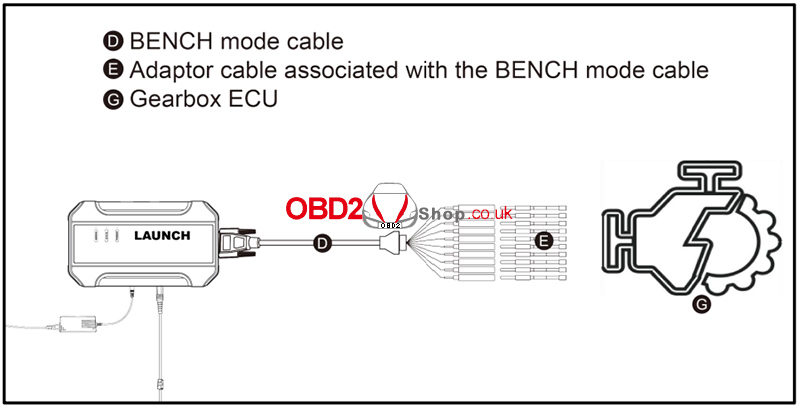
3. Click the Direct Connection Diagram to view the ECU wiring diagram.
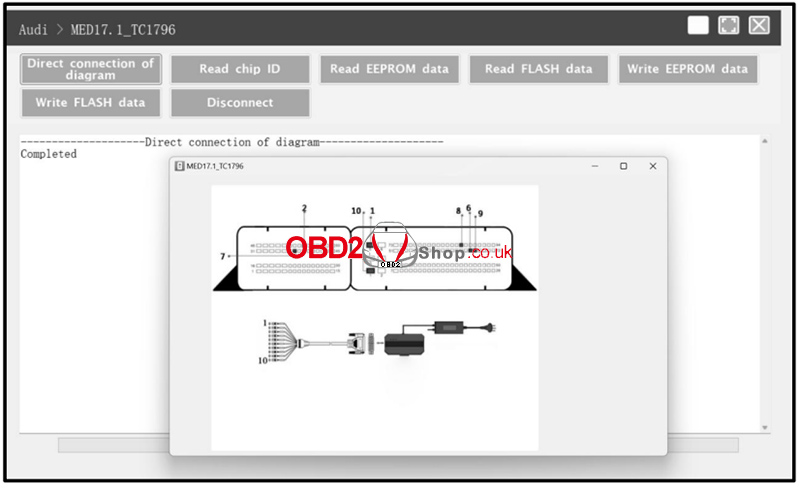
4. Refer to the wiring diagram and use the BENCH mode cable together with the appropriate adapter cable to connect the ECU to the Launch X431 ECU & TCU Programmer.
5. Once the connection is completed, click Read Chip ID to identify the ECU and confirm communication.
Step 2: ECU Data Read and Write Operations
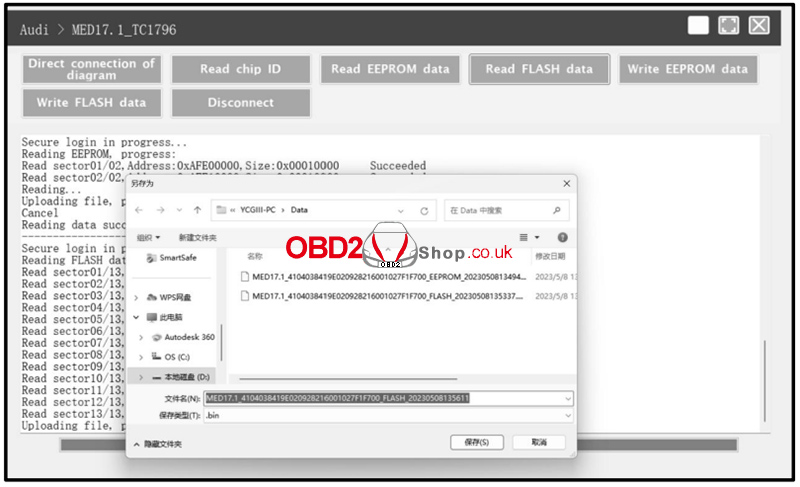
1. Click Read EEPROM Data to back up the EEPROM data and save the file to your device.
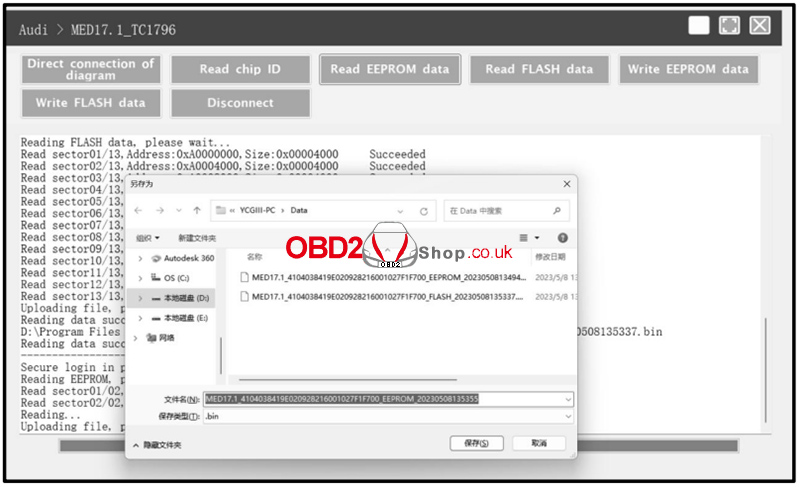
2. Click Read Flash Data to back up the Flash data and save it securely.
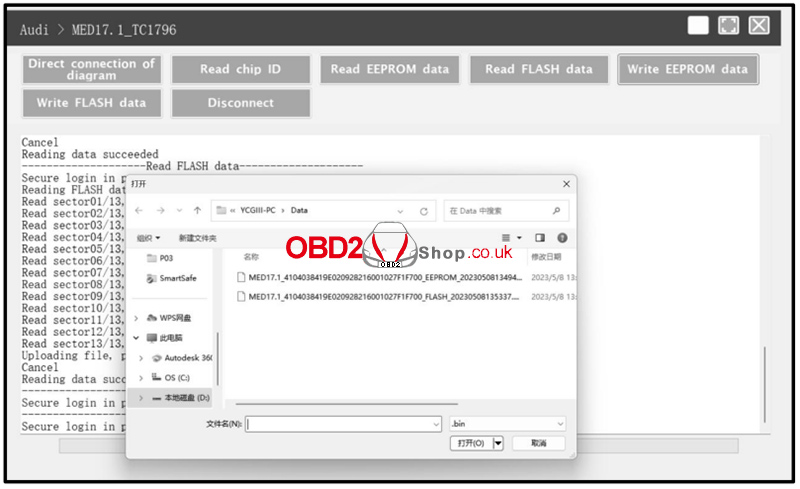
3. To restore data, click Write EEPROM Data and select the corresponding EEPROM backup file.

4. Click Write Flash Data and choose the appropriate Flash backup file to complete the data restoration process.
Conclusion
Using the Launch X431 ECU & TCU Programmer, you can efficiently perform ECU data reading and writing through bench mode. Always ensure correct wiring based on the connection diagram and back up all original data before writing to the ECU to avoid potential risks.
For more professional automotive diagnostic tools and guides, visit:
www.obd2shop.co.uk