
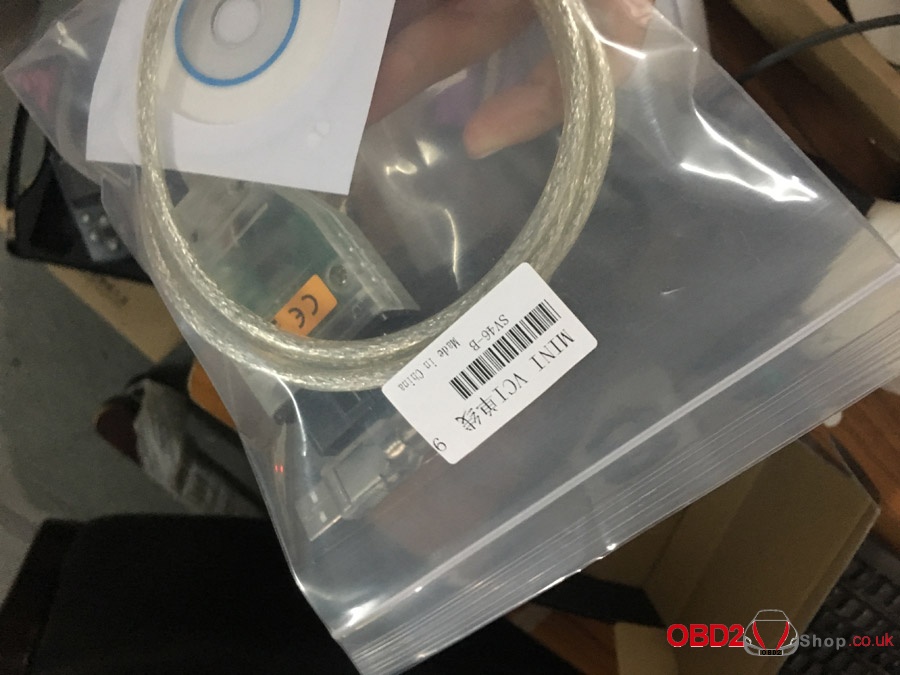
If you have MINI VCI J2534 cable clone with Techstream V12.20.024 to install on win8 64bit, you may have trouble even you followed the instructions from the CD and installed everything only to find error: Unable to connect to vim Techstream.
After troubleshooting the error, you may have new trouble.
If you run Techstream 10.10.018, it will work.
Here download link for Techstream 10.10.018 as well as Driver MVCI_Driver_for.msi.
Simple guide:
Firstly you need to stop windows from automatically installation the driver when plugging in the MINI VCI cable to the USB port.
Refer to the link below, if you don’t know how to do this. .
https://ccm.net/faq/35640-prevent-wi…ng-new-drivers
If the drivers are already installed, please go to device manager and uninstall the below:
“USB Serial Port (COM3)” in the “Ports” root menu AND “USB Serial Converter” in the “Universal Serial Bus controllers” root menu
Secondly, please note: “FirmwareUpdateTool.exe” will not work on Windows 8/8.1/10
Skip this step, as this will not work.
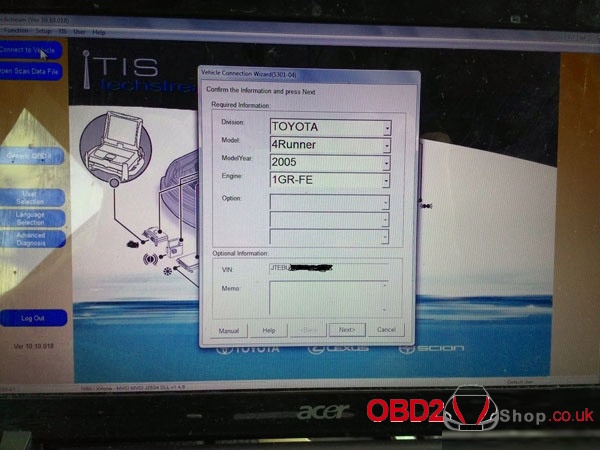
Start Techstream from the Desktop shortcut. Chose your region, enter the deal information (you can enter anything). Go to Setup | VIM Select menu and select the “XHorse – MVCI”. Connect USB Interface cable to your car’s OBDII interface, turn ignition on, then click “Connect to Vehicle” in Techstream. It will take a few moments to connect and you can proceed with selecting your vehicle.
1. Connect USB cable to laptop
2. Start laptop
3. Start Techstream
4. Start Car (Can also be in ACC ON, but get better results generally with car in Ready)
5. Plug OBD to car
6. Connect via Techstream
INSTALLATION INSTRUCTIONS Techstream on Windows 7, 8.1 – x64 bit
If you bought the MINI VCI J2534 cable and there is no unpacked driver on the disk, and there is only the MVCI Driver for TOYOTA.msi installer that does not really work when installed on any Windows x64 and gives an error, and it must be installed, otherwise the sw will not work, and it does not matter. This problem can be solved by installing the MVCI Driver for TOYOTA.msi manually as follows:
1. Create a folder on drive C: \ Temp
2. Copy to our C: \ Temp folder our MVCI Driver for TOYOTA.msi file
3. With Administrator rights open and run the following command:
msiexec / a “C: \ temp \ MVCI Driver for TOYOTA.msi” / qb TARGETDIR = c: \ temp \ mvci
this command will extract all content from the MSI file to the C: \ Temp \ mvci folder
4. We delete the file MVCI Driver for TOYOTA.msi from the folder C: \ Temp \ mvci, it is no longer needed, we can also remove it from the folder C: \ Temp
5. We go in C: \ Program Files (x86) and create there folder \ XHorse Electronics \ and in it one more \ MVCI Driver for TOYOTA TIS \ and move there all the contents from the folder C: \ Temp \ mvci
6. Connect the MINI VCI cable to the USB port.
IMPORTANT: When the automatic driver installation process starts, it must be canceled and the device will not be detected.
7. Open the Device Manager and locate the two faulty devices in the list. They will have a yellow icon indicating that Windows could not install the drivers for them. Now right click on the faulty device, select “Update Driver”, then “search on this computer” next “Browse my computer” … and specify the path to “C: \ Program Files (x86) \ XHorse Electronics \ MVCI Driver for TOYOTA TIS “(” include subfolders “check box). Click the “Next” button and wait for the drivers to be installed.
Now you should see two new devices: “Controllers USB \ USB Serial Converter” and “Ports (COM & LPT) \ USB Serial Port (COM —)”. Where instead of a line will be your figure COM port.
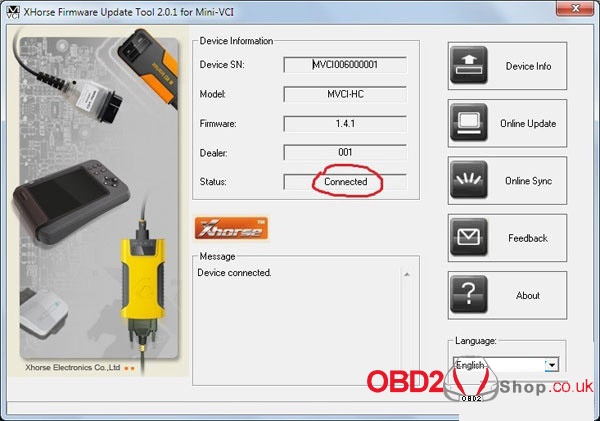
8. Next, go to the path “C: \ Program Files (x86) \ XHorse Electronics \ MVCI Driver for TOYOTA TIS” and run the file “FirmwareUpdateTool.exe”.
In the opened program, click the “Device Info” button. You should see the “connected device” graph filled.
If you see this, then your MINI VCI works under a 64-bit version of Windows and can be used by other programs, such as Techstream.
There is a connection with the cable!
9. Now install Techstream using the software “Techstream.exe” of any version. after installation do not run it yet.
10. To activate it, you need to change the TISFunction = 1 line in the C: \ Program Files \ Toyota Diagnostics \ Techstream \ Env \ IT3System.ini file and change it to “0” and save the file.
Now you need to make the program see the cable
So that Techstream sees MINI-VCI under Windows x64, the Registry should be changed like this:
1. Open the Windows Registry Editor, on Windows 8.1 x64, the path is:
[HKEY_LOCAL_MACHINE \ SOFTWARE \ PassThruSu pport.04.04 \ DENSO CORPORATION – TIS Techstream VIM]
But there must definitely be a folder \ PassThruSupport.04.04 \ and it has a subfolder (I have DENSO CORPORATION – TIS Techstream VIM) it should have the following parameters
: “Name” = “XHorse – MVCI”
“Vendor” = “XHorse ELECTRONICS Co., Ltd.”
“ConfigApplication” = “C: \\ Program Files (x86) \\ XHorse Electronics \\ MVCI Driver for TOYOTA TIS \\ FirmwareUpdateTool.exe”
“FunctionLibrary” = “C: \\ Program Files (x86) \\ XHorse Electronics \ \ MVCI Driver for TOYOTA TIS \\ MVCI32.dll ”
” APIVersion “=” 04.04 ”
” ProductVersion “=” 1.1.0 ”
“J1850VPW” = dword: 00000001
“J1850PWM” = dword: 00000001
“ISO9141” = dword: 00000001
“ISO14230” = dword: 00000001
“CAN” = dword: 00000001
“ISO15765” = dword: 00000001
“SCI_A_ENGINE” = dword: 00000000
” SCI_A_TRANS “= dword: 00000000
” SCI_B_ENGINE “= dword: 00000000
” SCI_B_TRANS “= dword: 00000000
Also there is a section
[HKEY_LOCAL_MACHINE \ SOFTWARE \ PassThruSupport.04.04 \ DENSO CORPORATION – TIS Techstream VIM \ Parameter]
“Baudrate” = dword: 0001c200
“Comport” = dword: 00000005
“Connect” = dword: 00000000
“Interface” = “AUTOMATIC”
” Firmware “=” x ”
” LE “= dword: 00000000
” LN “= dword: 00000001
” SN “= dword: 00000000
But you can manually do nothing, but simply make changes to the registry by downloading and running this file .
2. Launch Techstream. Go to Setup | VIM select will open the menu in it should be “XHorse-MVCI”
3. Connect the MVCI cable to the USB interface, start the program, then click “Connect to Vehicle” in Toyota Techstream. If everything works, you will be asked to confirm the car / year / model, and if you connect to the car and start it, you will get access to the diagnostic interface.
The first thing to do was to turn off the orange American DRLs. other features stay tuned!