
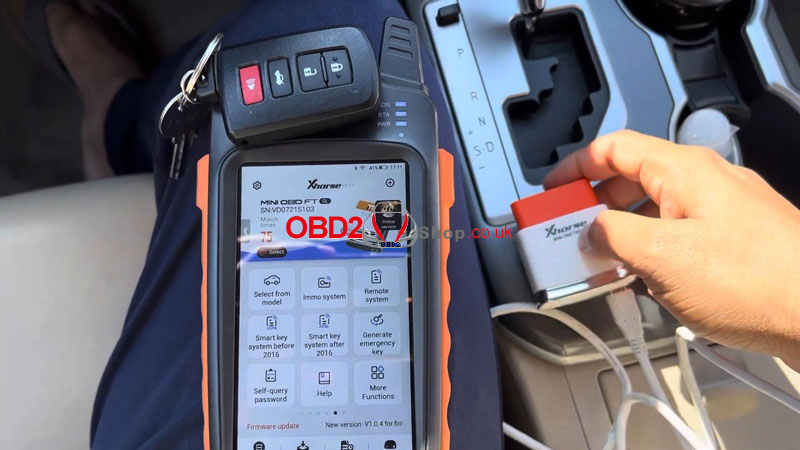
In this guide, we’ll show you how to add and delete smart keys on a 2017 Toyota Camry using the Xhorse FT-OBD Mini Tool, working together with VVDI Key Tool Max or Key Tool Max Pro.
Since we have the original working key, the process is straightforward. Let’s get started.
Step 1: Connect and Enter Programming Menu
1. Connect the Toyota Mini Tool to the vehicle’s OBD port.
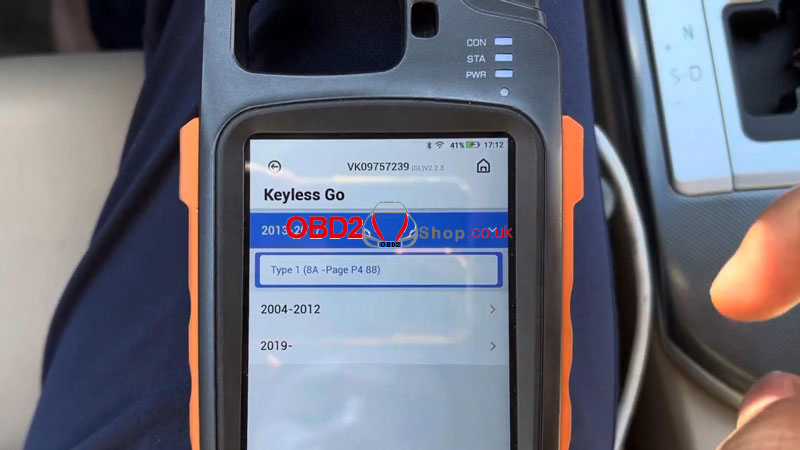
2. On the VVDI Key Tool Max / Max Pro, navigate to:
Select from Model → Camry → Keyless Go → 2013–2017 →
Type 1 (8A – Page P4 88) → Step 3 – Adding Keys → Start Execute → Clear Smart Keys
Step 2: Clear Existing Smart Keys
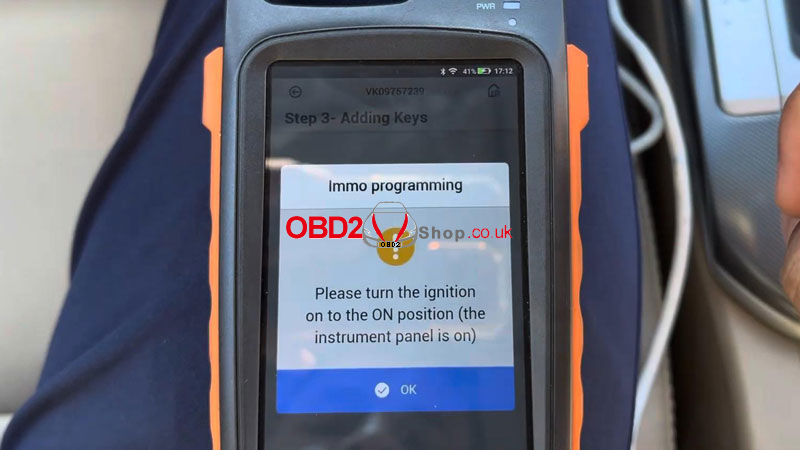
Follow the on-screen instructions:
Turn the ignition ON (instrument panel lights up).
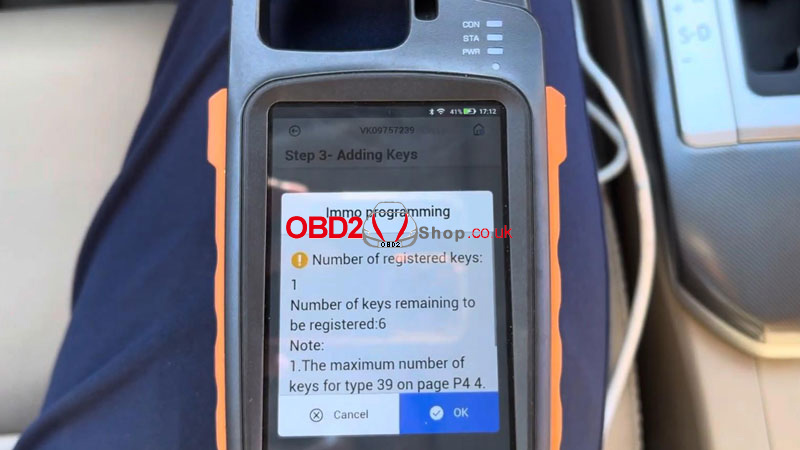
The system will display:
Number of registered keys: 1
Number of keys remaining to be registered: 6
Press OK.
Next:
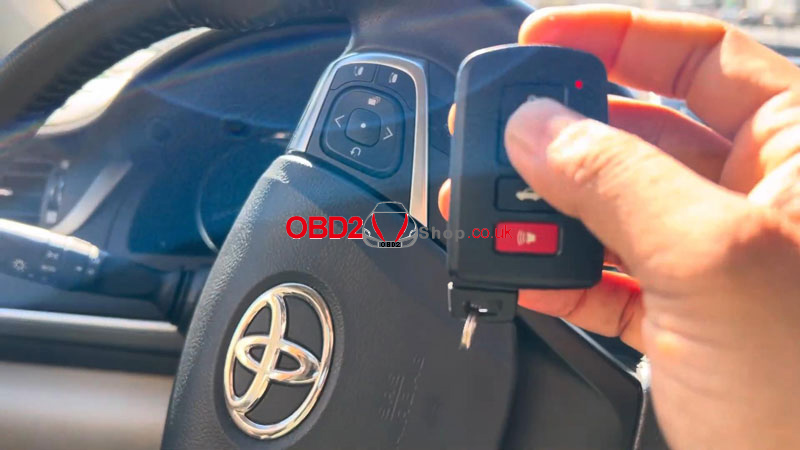
Touch the IGNITION (IG) switch with a registered key (logo side facing the switch).
Complete the operation within 30 seconds after pressing OK.
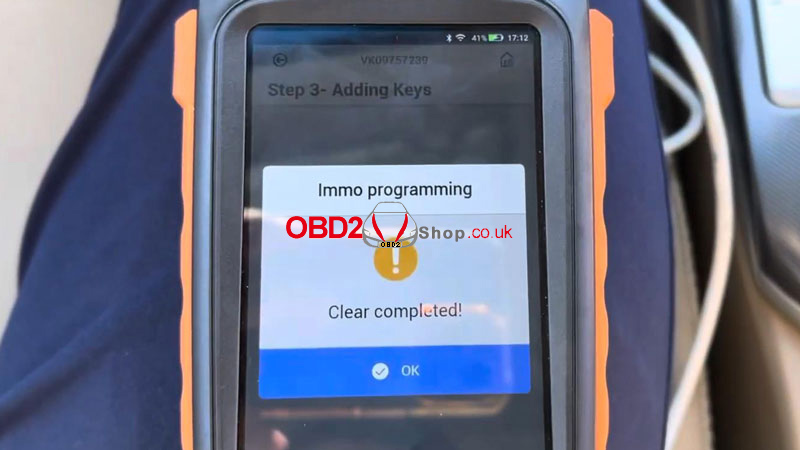
Once finished, you’ll see:
Clear completed!
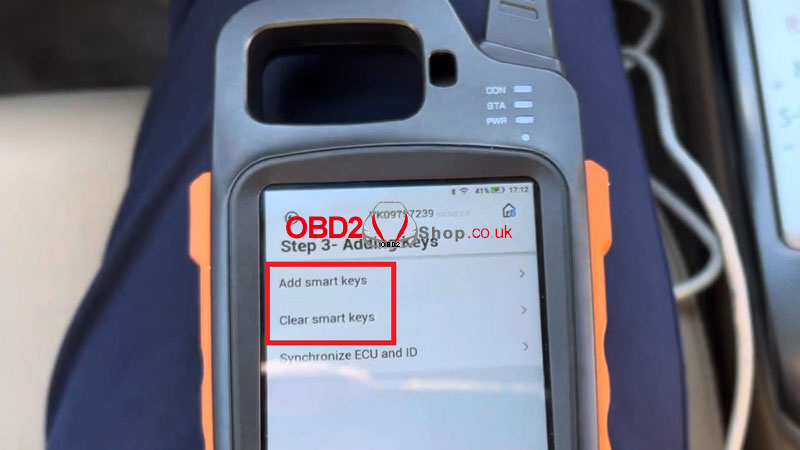

Step 3: Add a New Smart Key
Now select “Add Smart Keys.”
1. Turn the ignition ON again.
2. Press OK.
3. Within 30 seconds, touch the IG switch with a registered key using the marked surface.
The system will display:
Key detected, programming…
Keep the key touching the ignition switch.
Wait until the registration process is fully completed.
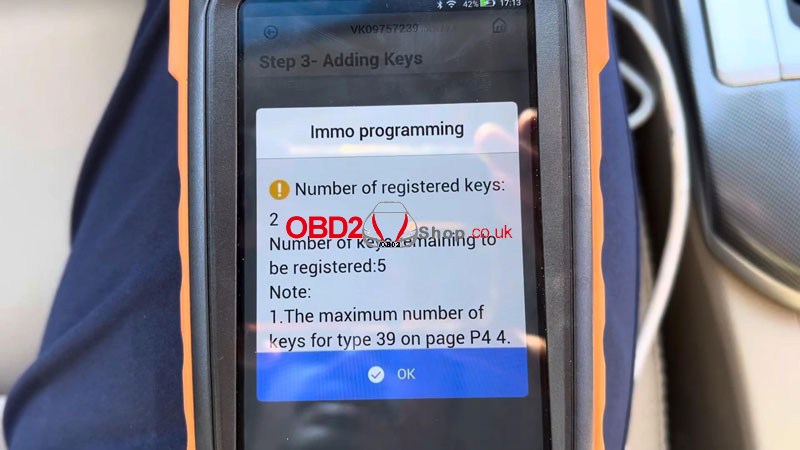
After successful programming:
Number of registered keys: 2
Number of keys remaining to be registered: 5
The matching is completed.
Final Check
1. Turn the ignition OFF.
2. Test both smart keys:
Remote functions work normally
Vehicle starts successfully
Key adding and deletion completed.