
")

")
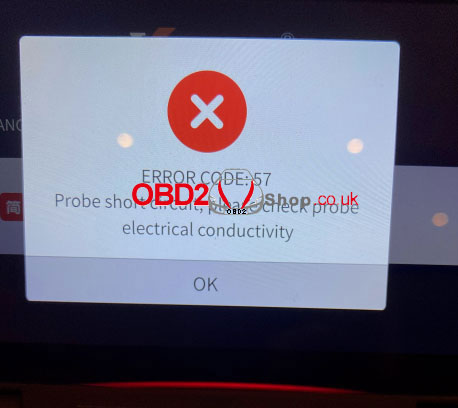
If your Xhorse Dolphin XP-005 displays “ERROR CODE: 57, Probe short circuit, please check probe electrical conductivity”, please follow this guide. Often, cleaning the probes and performing the built-in self-test via the “Electrical Conductivity Measurement” function can resolve the issue. If the problem persists, you may need to perform the following manual inspection for abnormal conductivity in the probe and milling cutter.
Inspection Method
1. Remove the Rear Cover
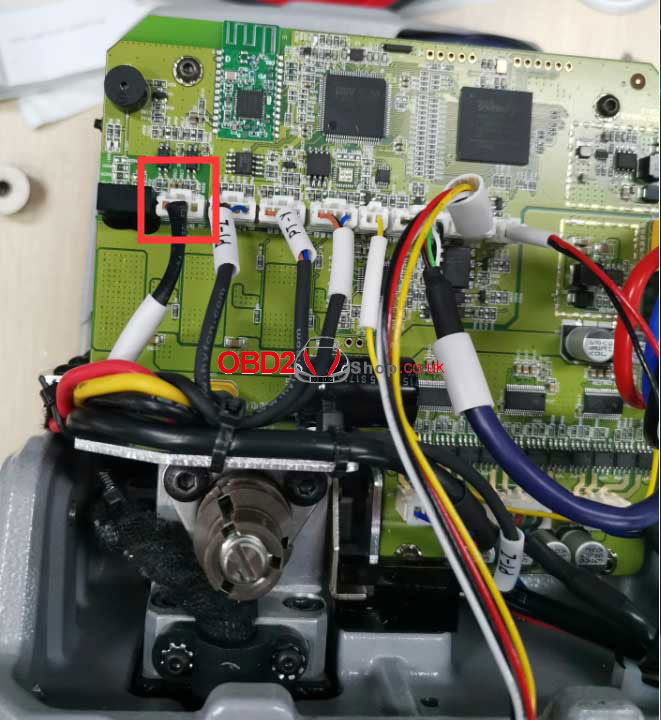
Carefully separate the rear cover, paying close attention to the internal wiring harness to avoid damage.
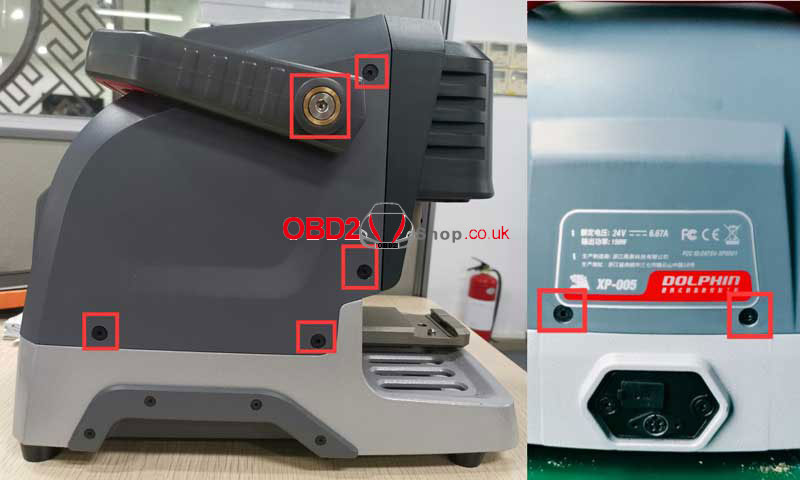
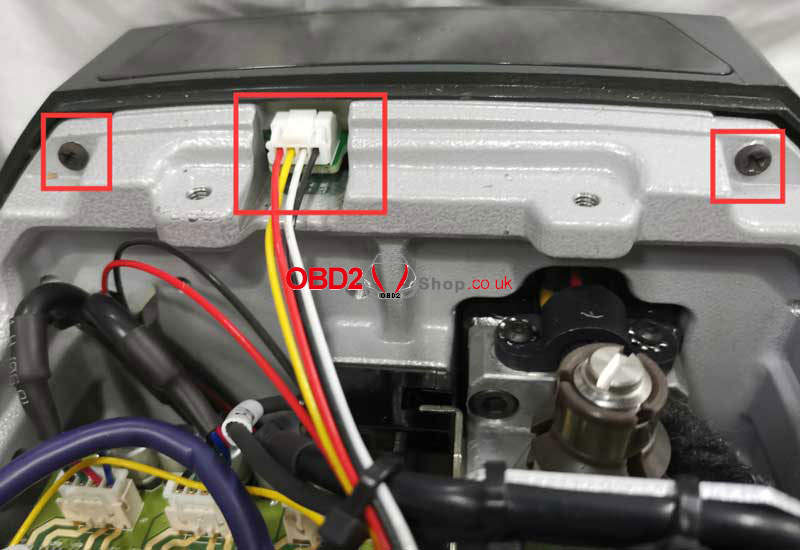
2. Disassemble Internal Components
* Remove the Phillips screws securing the wire harness.
* Remove the rubber pellets to access the screws hidden beneath them.
* Use a HEX screwdriver to remove the long strip component.

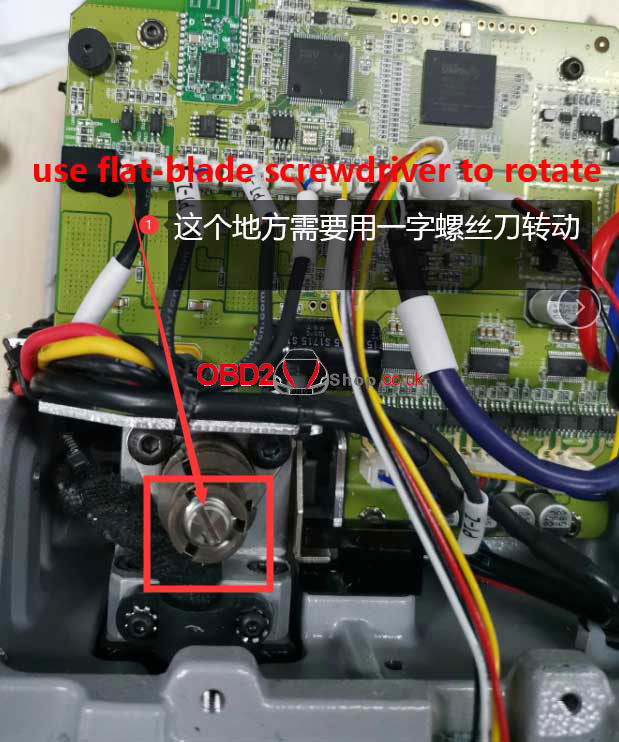
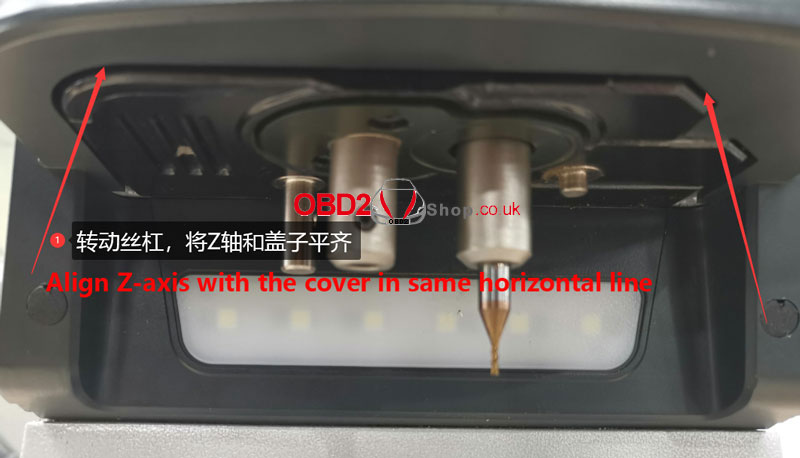
3. Access the Z-Axis and Probe Area
* Use a flat-blade screwdriver to manually rotate the lead screw. Adjust the Z-axis until its cover is aligned horizontally.
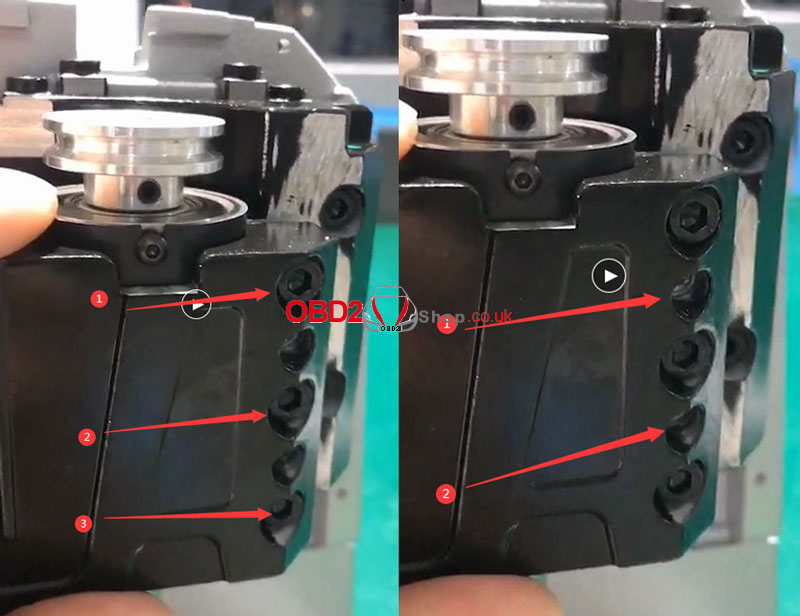
* Once aligned, remove the Z-axis housing. Install the probe in its slot next to the housing.
* Remove the screws indicated in the guide.
* Note: Be cautious of the small conductive wire inside the probe assembly.
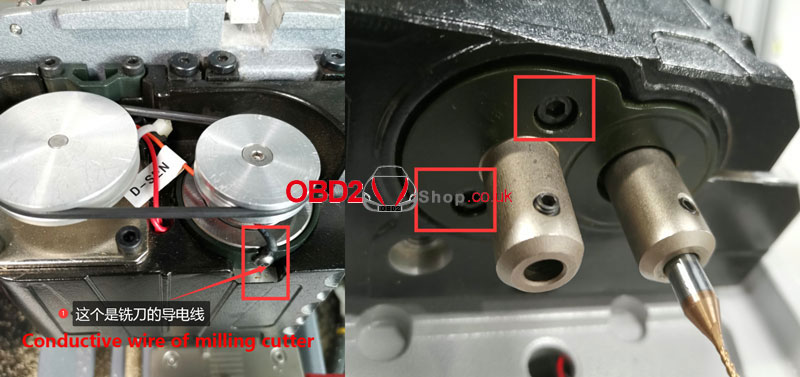
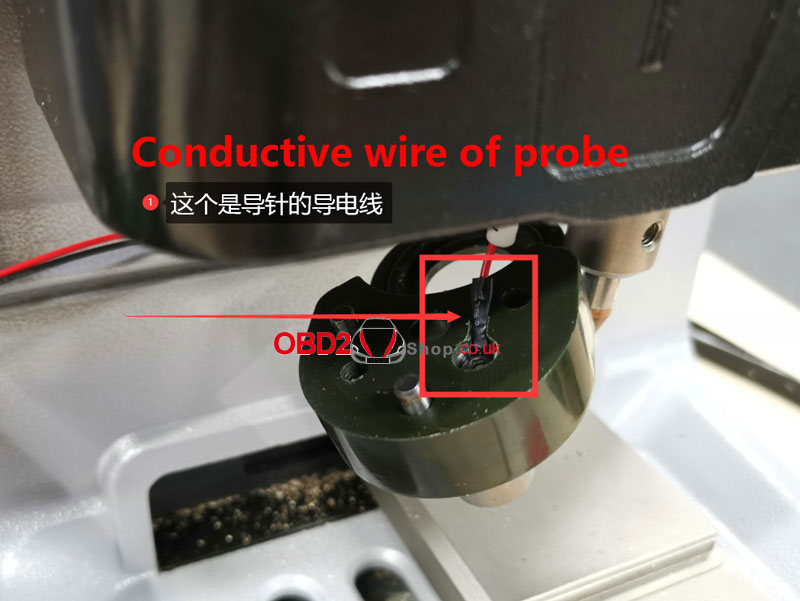
4. Check for Conductivity and Short Circuits
Inspect the wiring for the probe and milling cutter to check for proper conductivity or potential short circuits. This check should be performed with the wires connected to the main board. Alternatively, you can plug the main board cable back in temporarily to assist with detection.
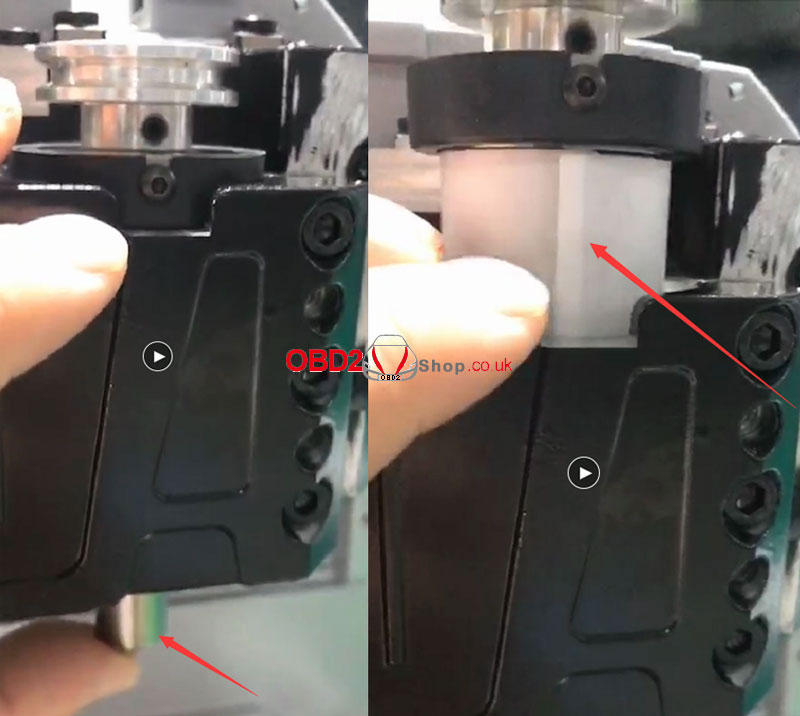
5. Inspect the Milling Cutter Shaft and Bearing
* Loosen the two Z-axis screws. Push these screws inward until a gap appears, which allows the shaft to be removed.
* Press on the milling cutter hole position and push it upward. Observe the internal white paper disc:
* If the paper is broken, the component needs to be replaced.
* If the paper is intact, check the bearing hole for any accumulated iron scraps or debris that could cause a short.
We hope this self-inspection guide is helpful. For further assistance, please feel free to contact us.