
")

")
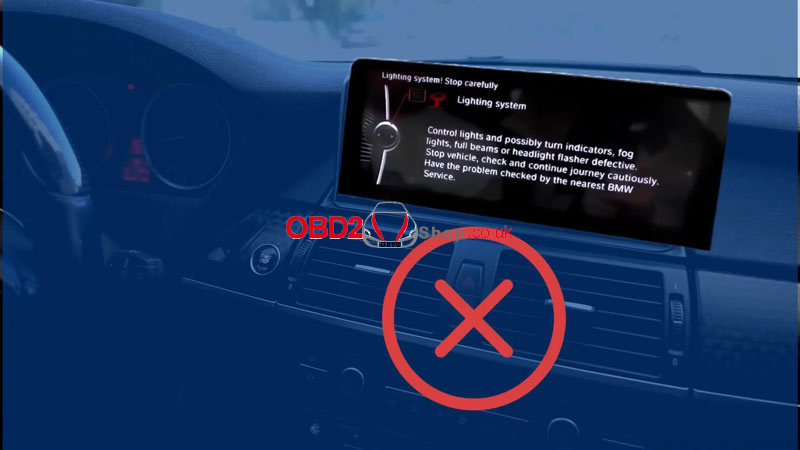
When all FRM (Footwell Module) functions on a BMW stop working, the issue is often caused by corrupted FRM data. In this guide, we’ll walk through how to repair a BMW XEQ384 FRM module using the Xhorse VVDI PROG.
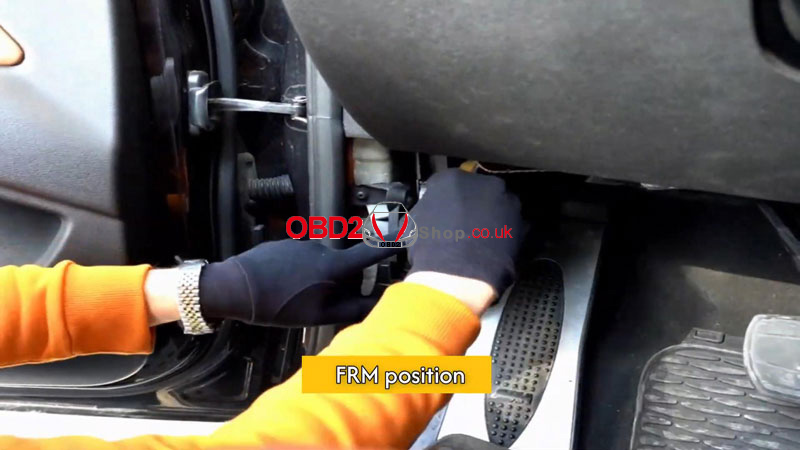
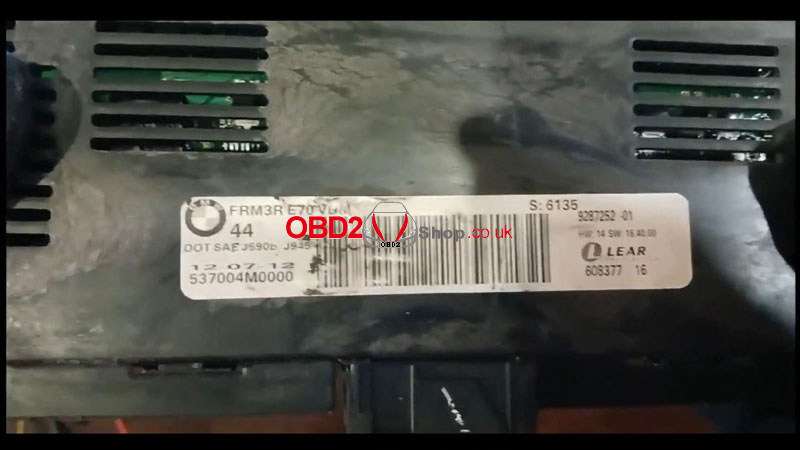
Step 1: Remove the FRM Module
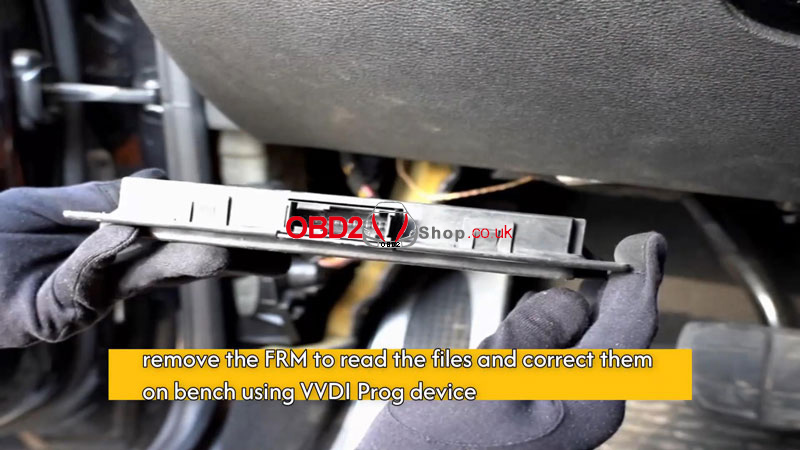
First, remove the FRM module from the vehicle. This allows us to read, edit, and write the data safely on the bench.
Step 2: Backup FRM Data
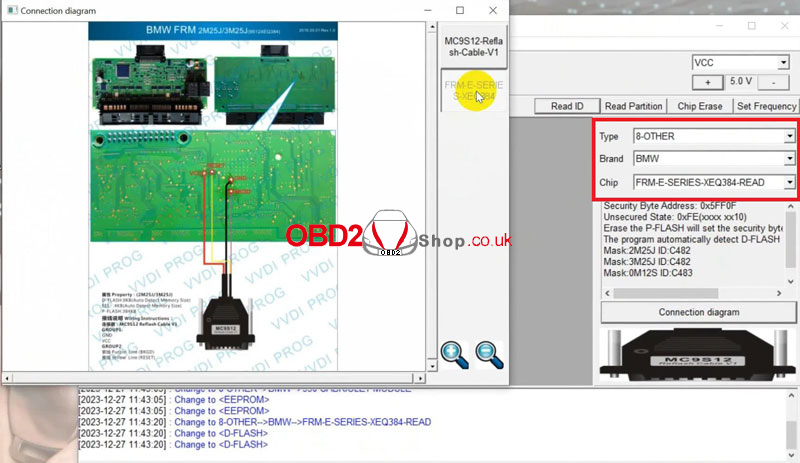
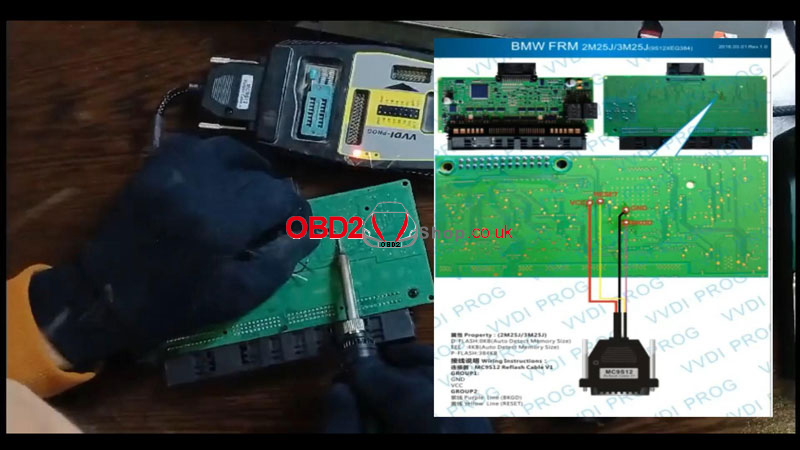
Connect the FRM Module
Follow the official wiring diagram to connect the FRM module to VVDI PROG.
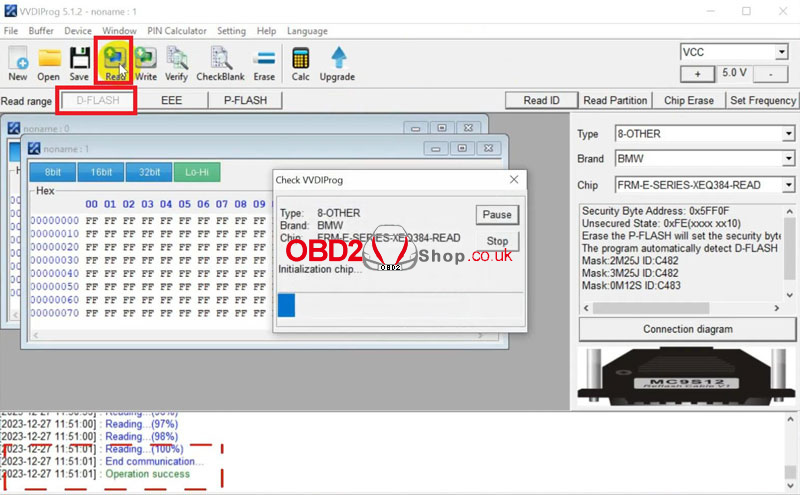
VVDI PROG Settings
In the VVDI PROG software, select:
Type: 8 – OTHER
Brand: BMW
Chip: FRM-E-SERIES-XEQ384-READ
Once the connection is successful, proceed with data backup.
Read and Save Data
Read and save the D-FLASH file
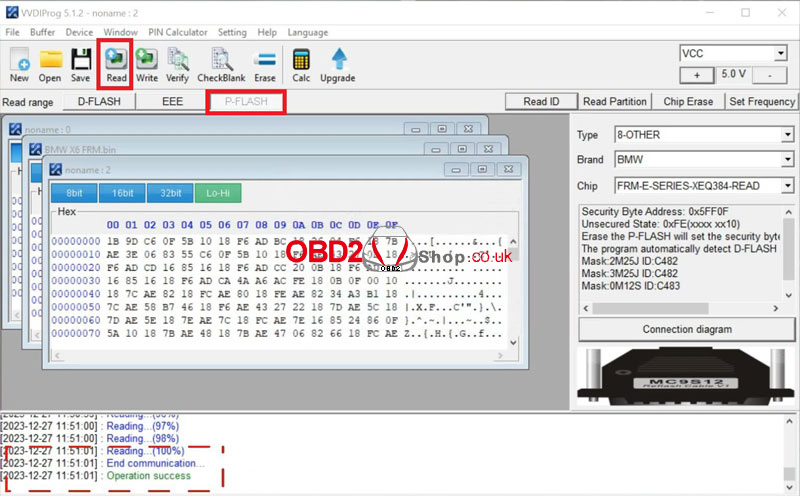
Read and save the P-FLASH file
After backing up:
Clear faults
Edit the D-FLASH file
Prepare the corrected file for writing
Note: You may use a third-party paid service to correct the D-FLASH file if needed.
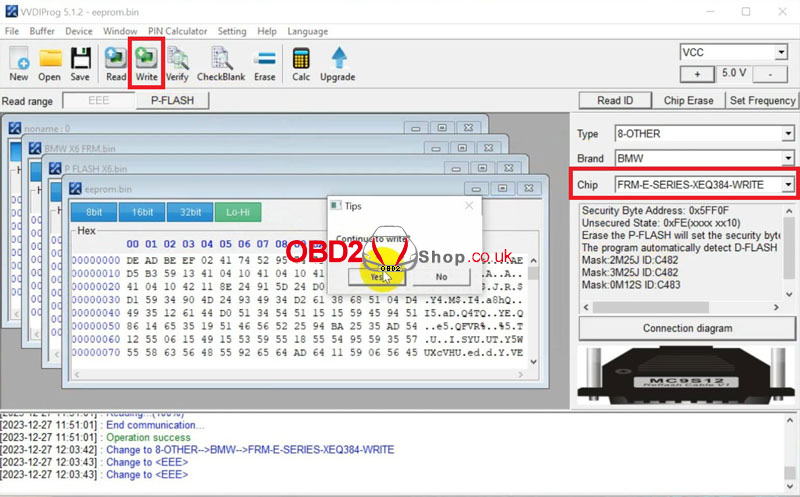
Step 3: Write Data Back to the FRM
1. Select FRM-E-SERIES-XEQ384-WRITE in VVDI PROG
2. Load the corrected EEPROM file
3. Click Write
4. Wait for the Writing Success confirmation
Once completed, reinstall the FRM module into the BMW.

Final Check
After installation:
Recheck all FRM functions
Confirm lights, windows, and related systems are working normally
Repair complete.