
Routine maintenance tasks—such as brake pad replacement, oil changes, or resetting service indicators—are part of everyday vehicle repair. Whether you are a professional technician or a DIY car owner, the OTOFIX D1 diagnostic tablet helps simplify and accelerate these jobs.
This guide demonstrates how to perform an Oil Light Reset on a Volkswagen using the OTOFIX D1, highlighting the efficiency and user-friendliness of the process.
1. Connect the V1 VCI to the Vehicle
To begin, connect the OTOFIX V1 VCI to the vehicle’s OBDII port.
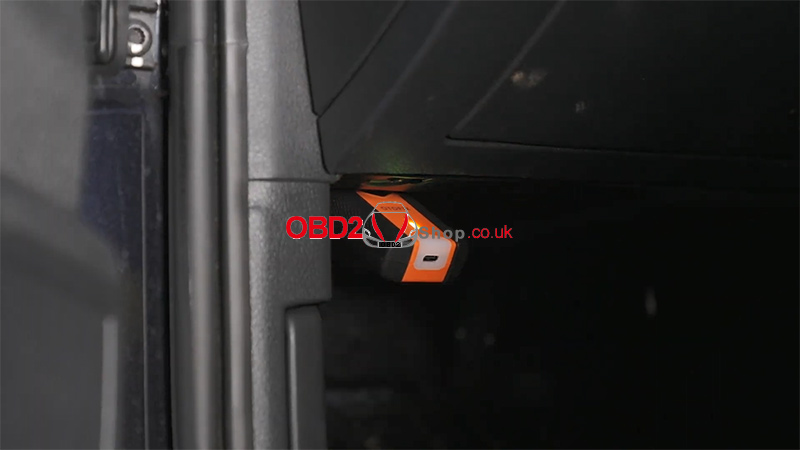
Next, open the VCI Manager on the OTOFIX D1 tablet and pair it with the V1 via Bluetooth. Once the connection is established, you are ready to access all available service functions.
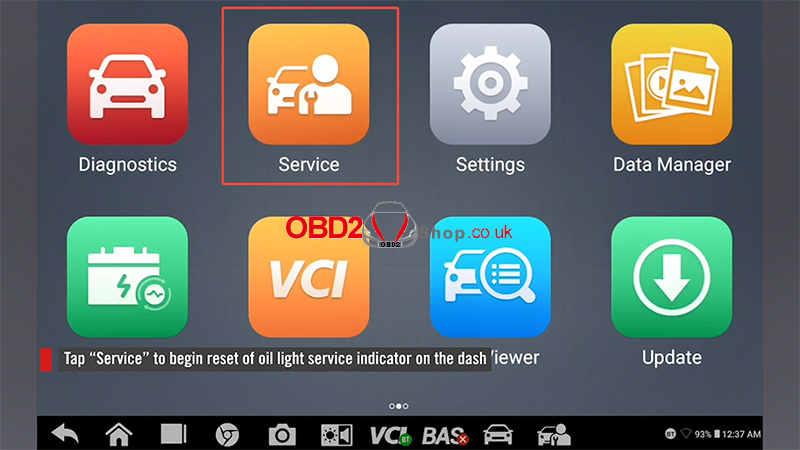
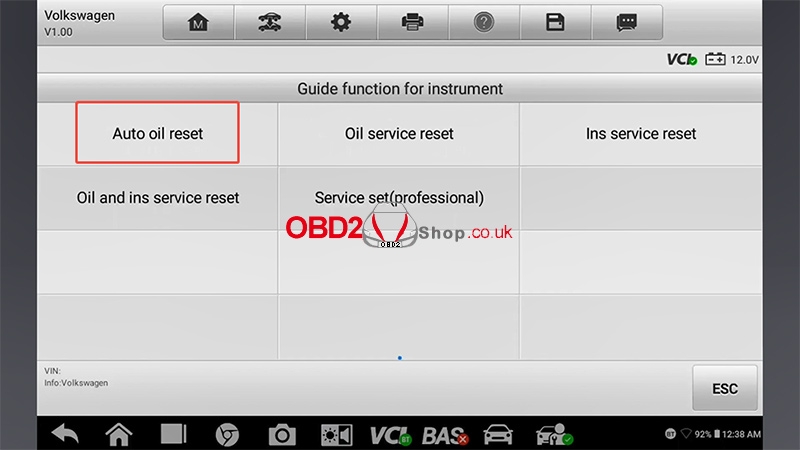
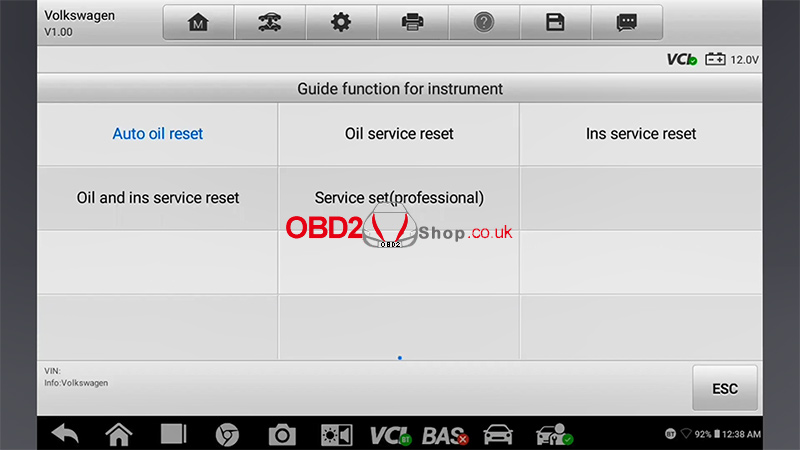
2. Access the Oil Reset Service Function
Resetting the oil service light is one of the most common vehicle maintenance tasks—and OTOFIX makes it remarkably straightforward.
After completing the oil change:
① Tap [Service]
② Select [Oil Reset]
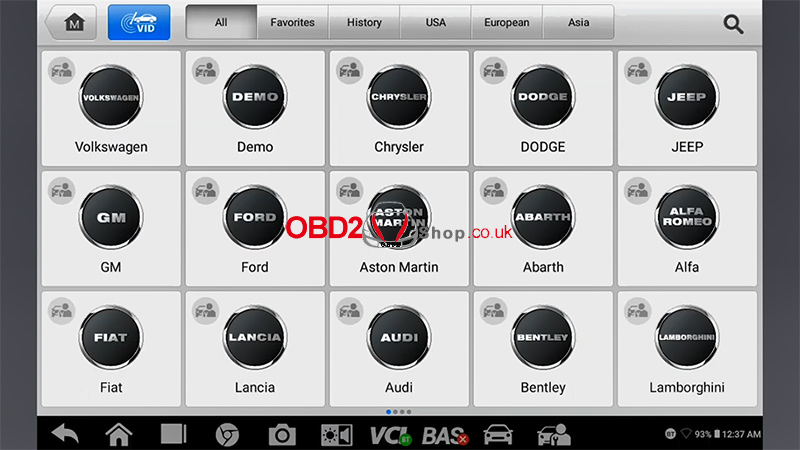
③ Choose [Volkswagen]
④ Tap [17 – Instruments]
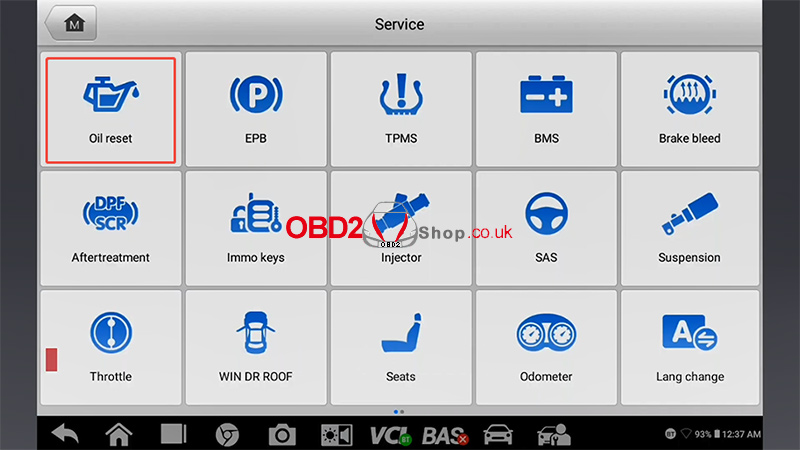

The system will initialize diagnostics and establish communication with the vehicle.
3. Perform the Automatic Oil Reset
To reset the service indicator automatically, select:
[Auto Oil Reset]
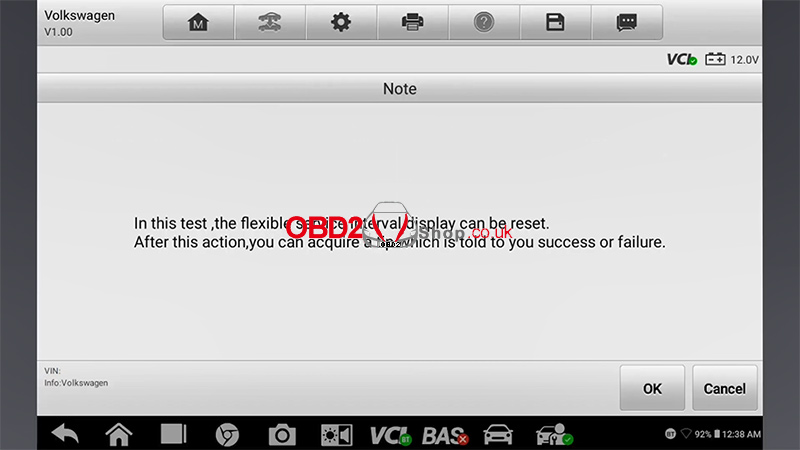
The device will confirm whether the reset can be performed.
Note: In this test case, the flexible service interval display is successfully reset.
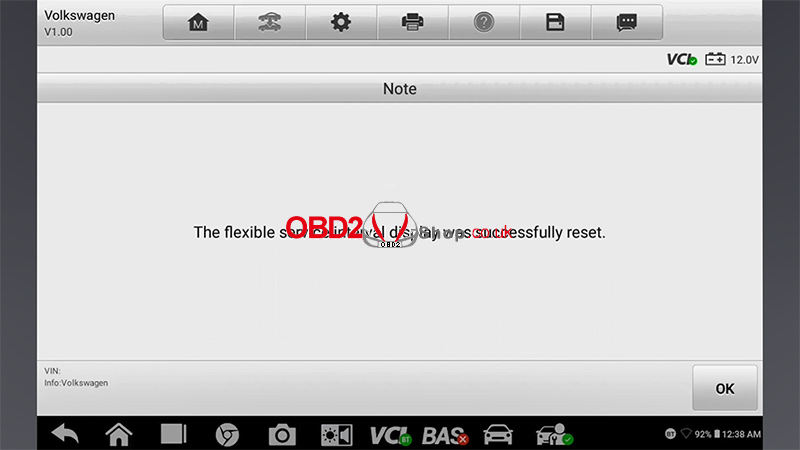
Once communication is complete, the message “The flexible service interval display was successfully reset” will appear.
Press [OK] to finish.
4. Manual Reset Option
If the automatic procedure cannot be completed, the OTOFIX D1 will display step-by-step on-screen instructions for performing the reset manually—ensuring you can still complete the service with ease.
For more diagnostic tools and automotive service equipment, visit:
www.obd2shop.co.uk